Getting Started with Lightning Projects
This section will go over how to create a project, choose an existing project, and to update the project location.
Creating a Project
Projects are Access databases, or SQL instances that contain information for one Project, and one or more Alignments. Projects are copies of the seed file. All of the settings from the seed file are brought over into the project file when the project is created. *No project data is stored in the Seed. Only the path of the projects.
- Start ArcMap.
- Click on the Lightning icon.

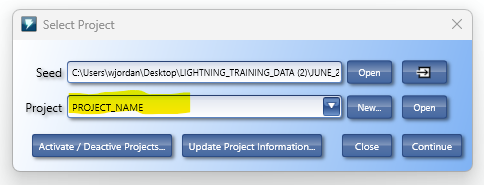
- Set the Seed File location.
- Select New from the main dialog box.
-png.png)
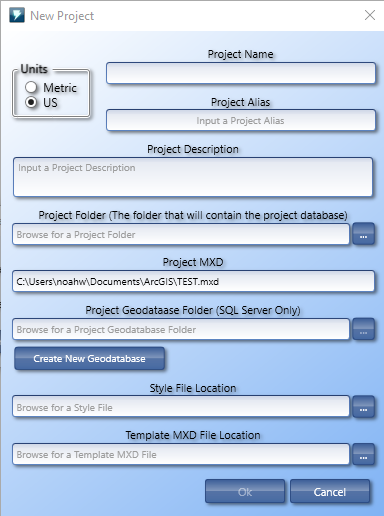
In the Project dialog box -

- Type the Name and Description of the new project.
- Set the units of measurement.
- Set the directory for the project.
- Confirm the project MXD location.
- Select the Style File location for the project.
- Click on OK to complete project creation.
*Make sure to have a saved MXD open to use with the project.
Selecting An Existing Project
Below are steps to continue from an existing project.
- Start ArcMap.
- Click on the Lightning symbol in the toolbar.

- Verify that Lightning is pointing to the correct seed file.

- Select the project from the drop-down list.

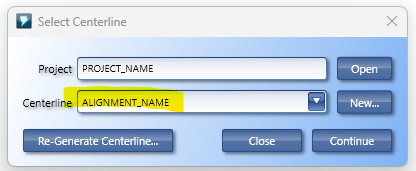
- Select the alignment associated with the project

- Click on Continue
Lightning will begin to load the project with all of its settings.
Relocating A Project
This option will allows users to change the source of the project and update the directory with associated files.
- Press the Relocate Project.
A new prompt will display for relocating the project.
- Select the project to relocate in the drop-down list.
- Set the new directory for the project.
- Choose the first option if the file geodatabase for the project is available , or select the second option to create a new file geodatabase.
- Confirm the style file location to use with the project.
*The default location for Lightning's style file is located here : C:\Program Files (x86)\Blue Sky Development, Inc\Lightning
