Lightning NexGen Quickstart Guide
This guide is meant for new users to get started using LNX! It will not train you on the tool, but will allow you to set up a new project successfully.
Prerequisites:
The following applications are REQUIRED to run LNX.
- Microsoft Access 64-bit
- Microsoft Database Engine 2016 (64-bit)
- Or if you are using SQL, 64 bit SQL Drivers
NOTE: This guide is a walkthrough of first-time project set up in Lightning NexGen. A User will need 3 things to get LNX sheet gen functioning.
- Layout
- Style File
- Layers
You can access all of this from our Training Dataset here.
Step 1:
- Create a new Project Map in ArcPro.
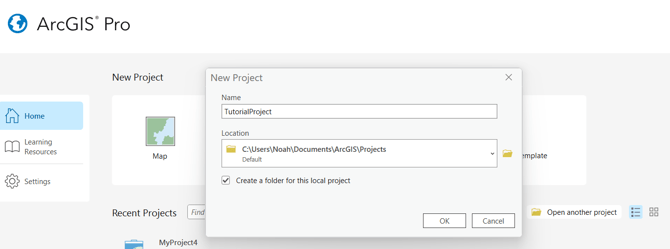
- Import your Layout (if you have one), or insert a Layout and configure it using LNX Layout Setup
- In my case, I will drag and drop my TrainingTemplate.mxd into the Catalog pane.
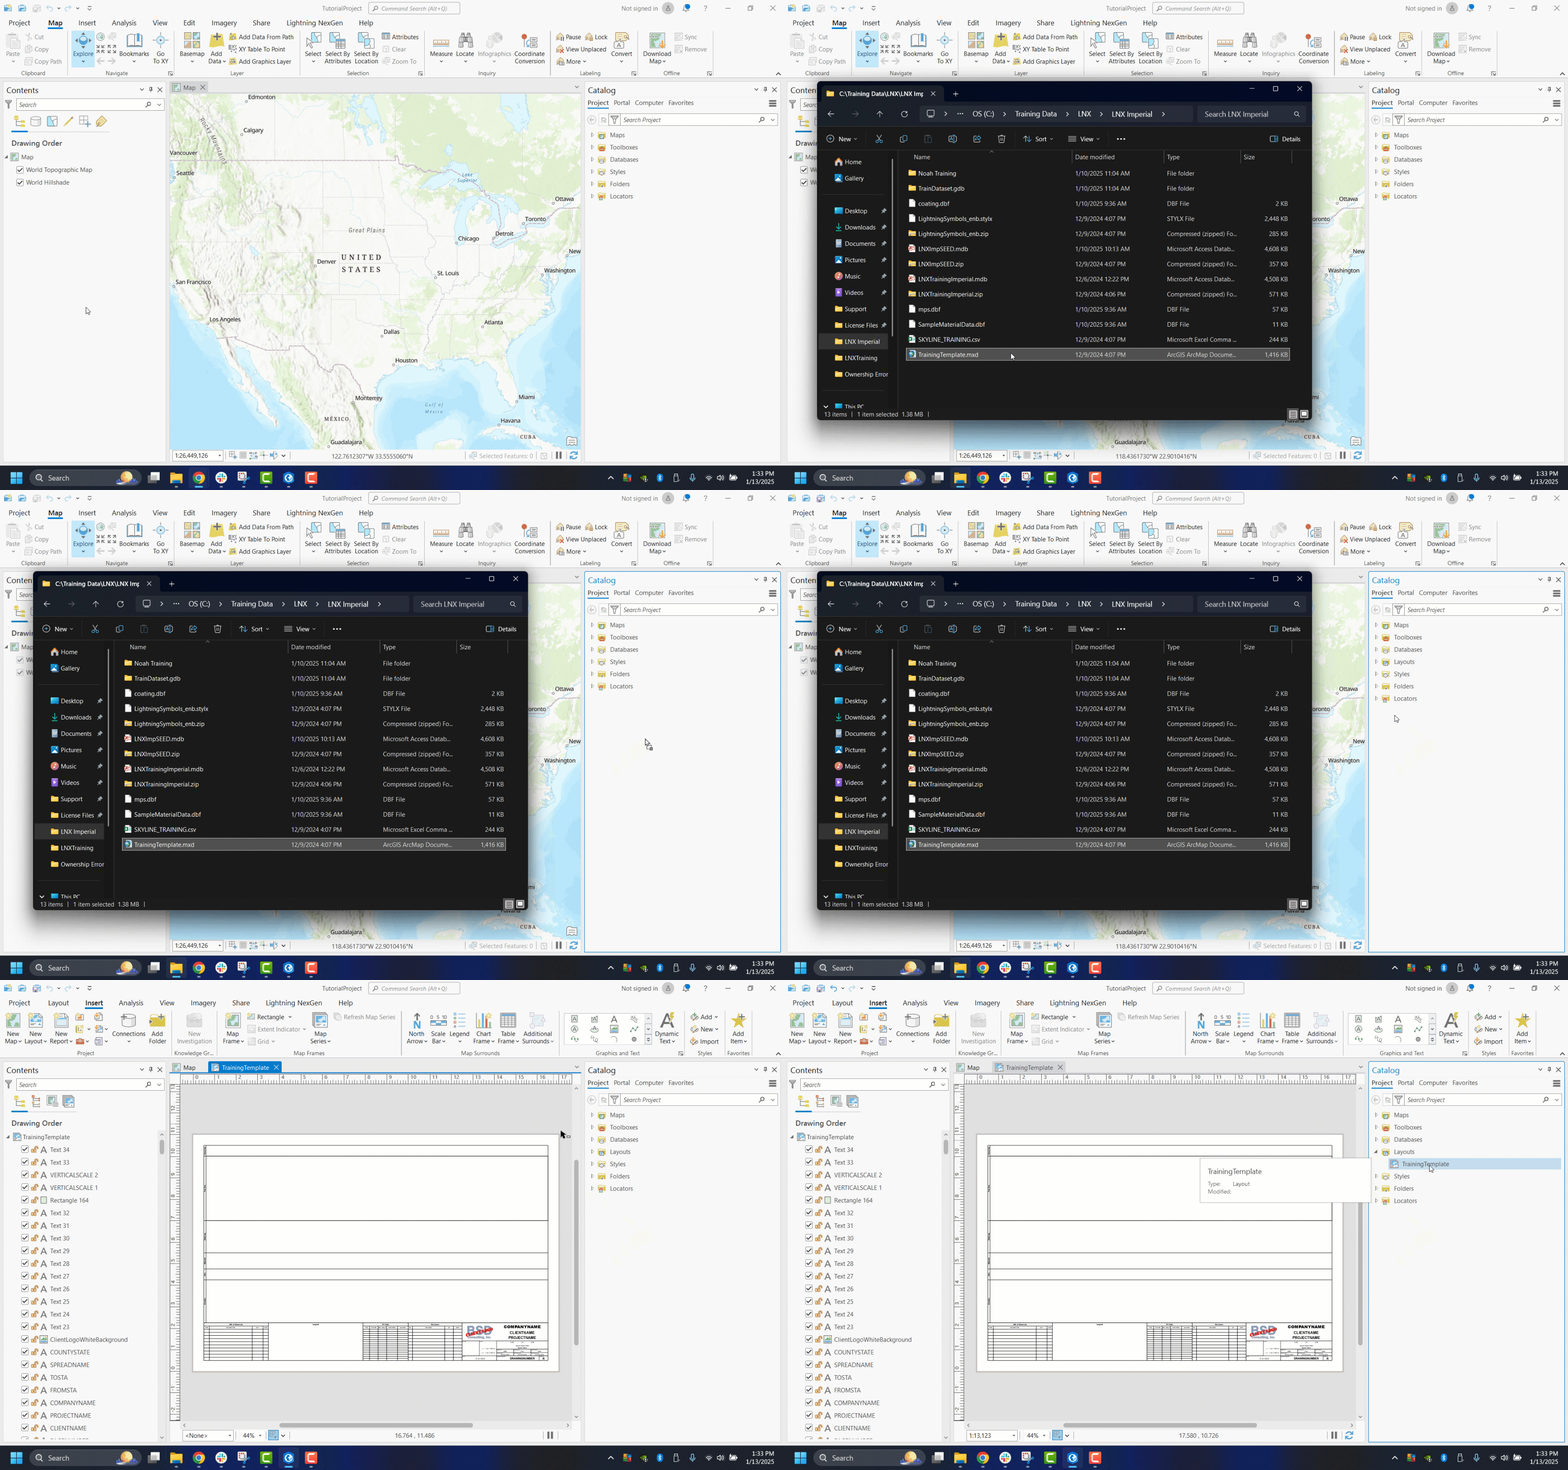
- If you do not have a Layout already, you can Insert a new one and configure it using the LNX Layout Setup tool.
- In my case, I will drag and drop my TrainingTemplate.mxd into the Catalog pane.
- Connect your Database to import Layers.

- After you have imported your layers in the Catalog pane, you can drag and drop them into the Contents pane.
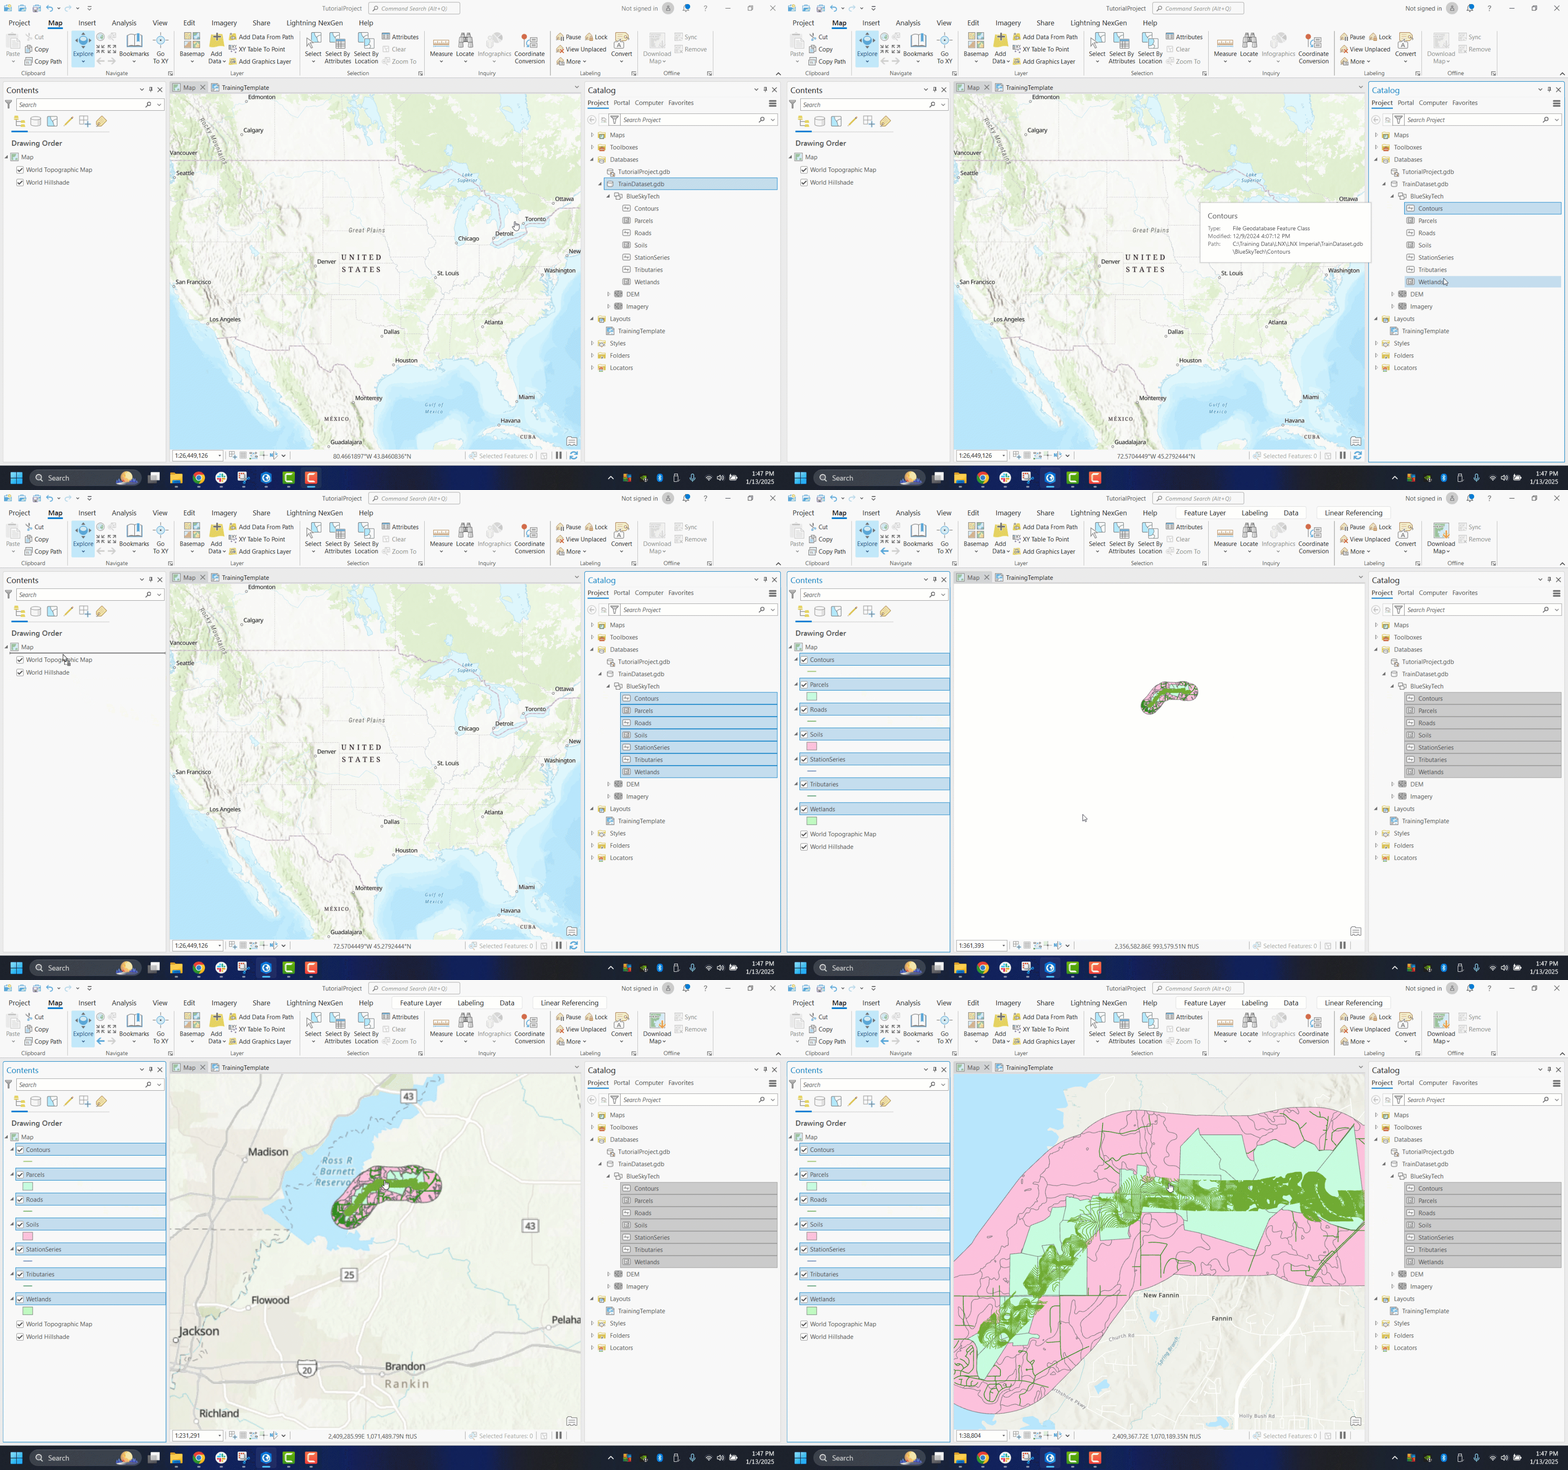
- After you have imported your layers in the Catalog pane, you can drag and drop them into the Contents pane.
- Add your Style File to the Styles dropdown in the Catalog pane.
- You can drag and drop the file onto the dropdown to import it.
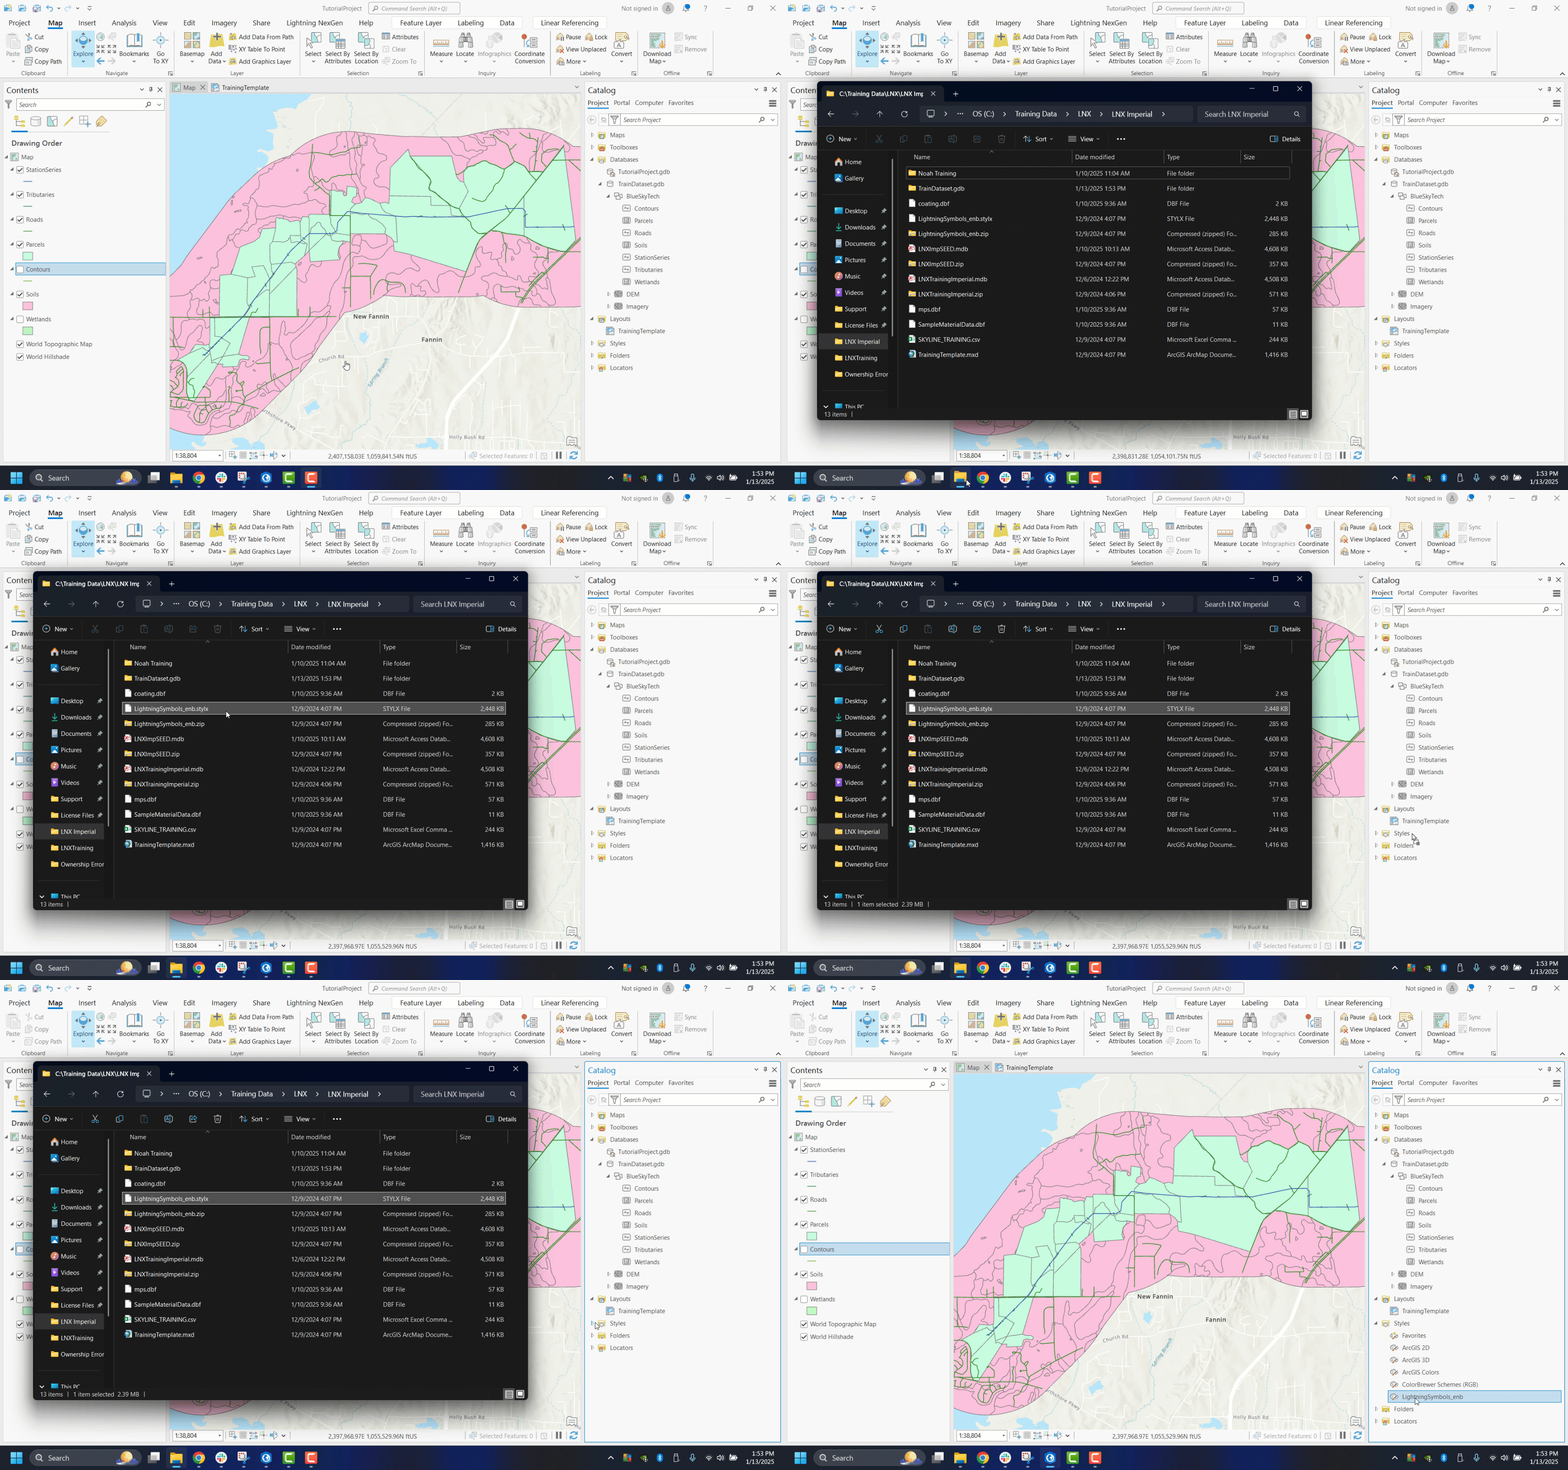
- You can drag and drop the file onto the dropdown to import it.
Step 2:
Walk through the LNX tools from left to right

- Select your Route Layer in the Contents pane, then click "Set Route Layer"
- Click "Set Source" to select your SEED File. Choose between SQL Server or Access.
- After pathing to your SEED File, you must click "Test Connection" before you select Continue.

- After pathing to your SEED File, you must click "Test Connection" before you select Continue.
- Click "Create New Project"
- Name the Project and select your Layout, Map Frame, Map, and Style Names.

- Name the Project and select your Layout, Map Frame, Map, and Style Names.
- Click "Add Alignment to Project"
- Zoom to your Route and select the Polyline.
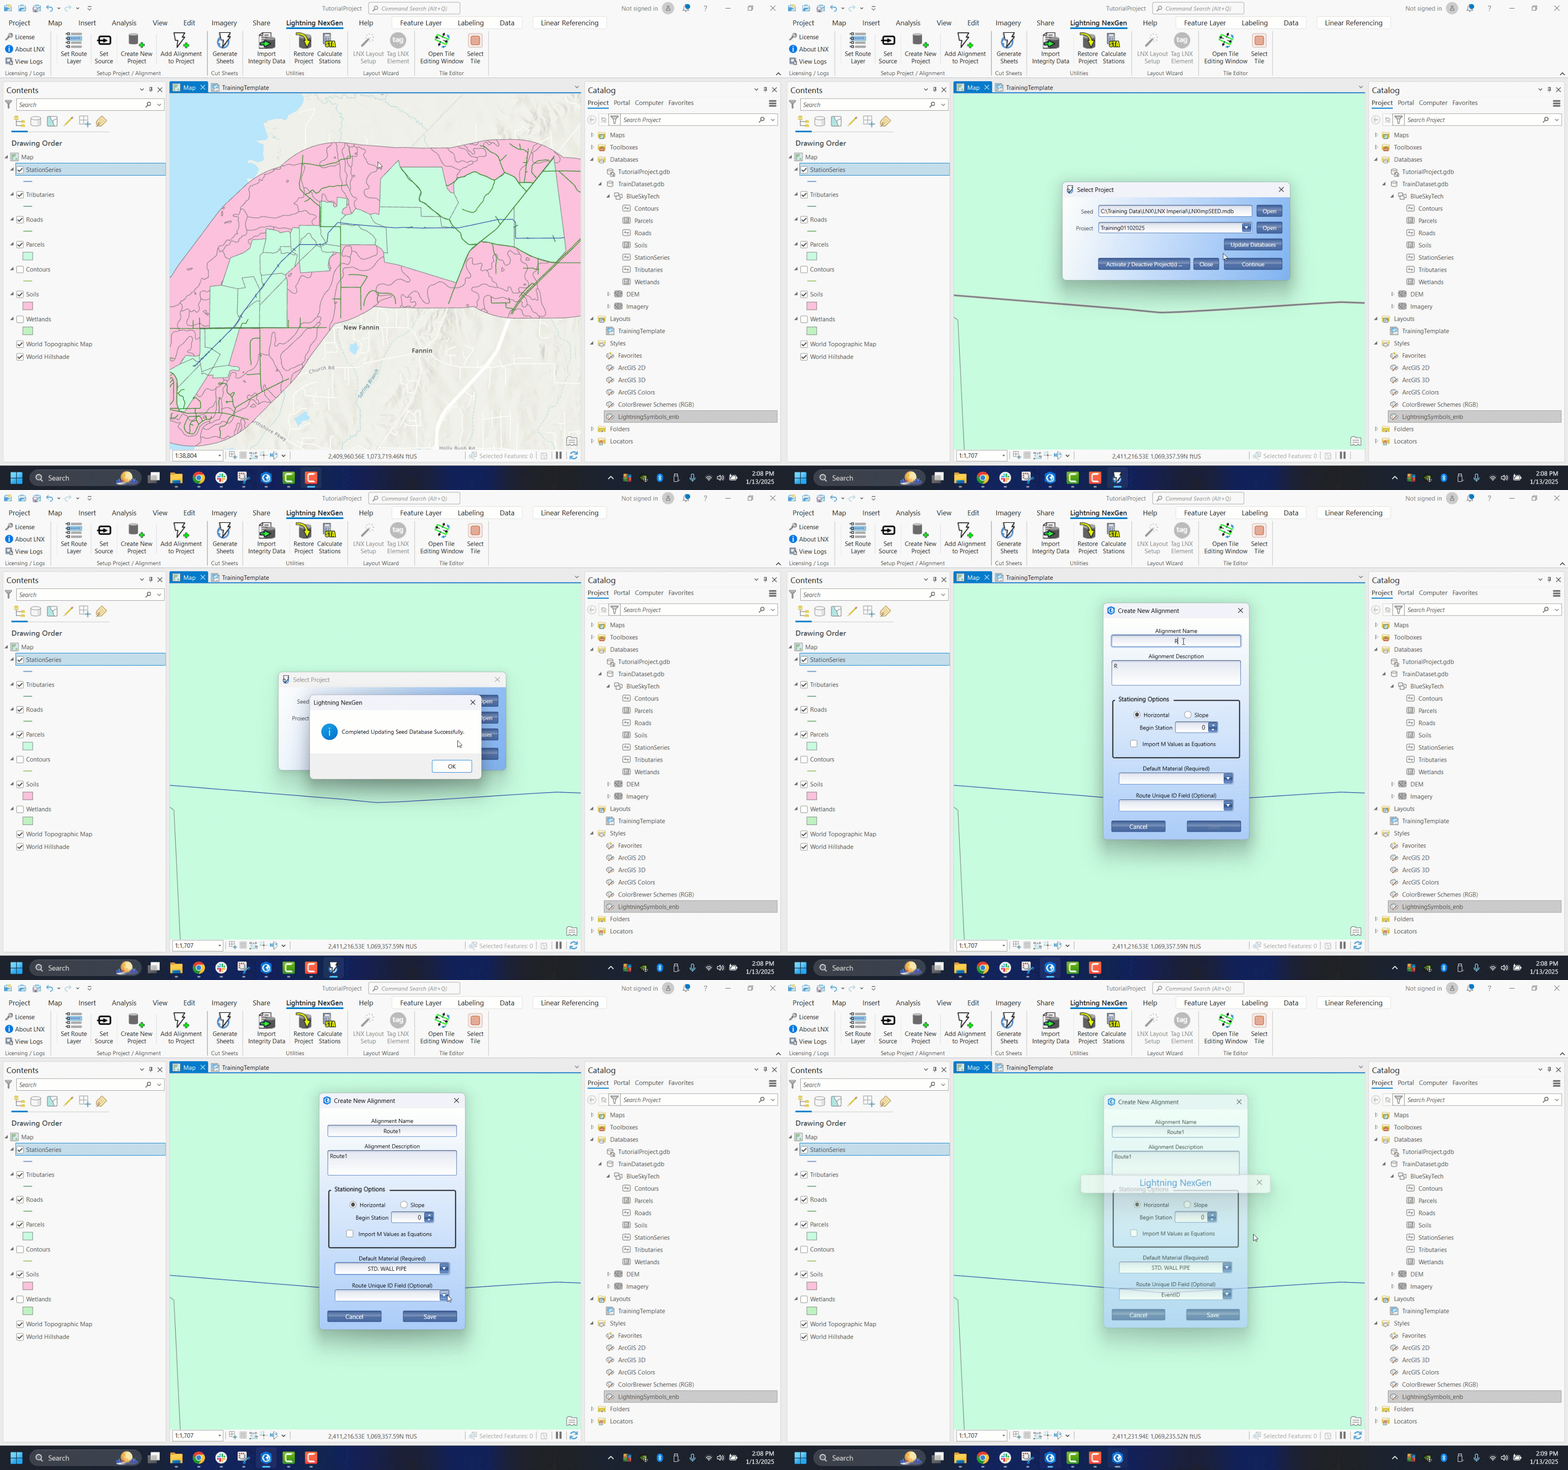
- Zoom to your Route and select the Polyline.
Step 3:
Congratulations! You are ready to cut sheets! Simply perform the following:
- Click the "Generate Sheets" icon

- Select your SEED File and Project
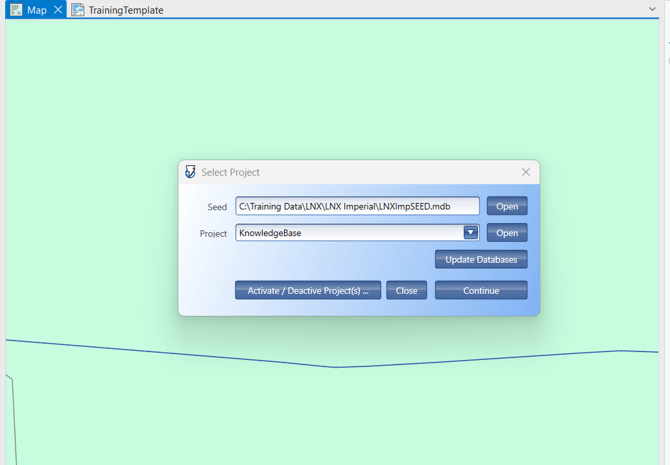
- Select your Centerline, and you are all set.
