Land: Land Management Tool
The Land Management Tool allows users to upload their parcel's documents and apply updates to their tracts in real time. Instructions for uploading parcels can be found here.
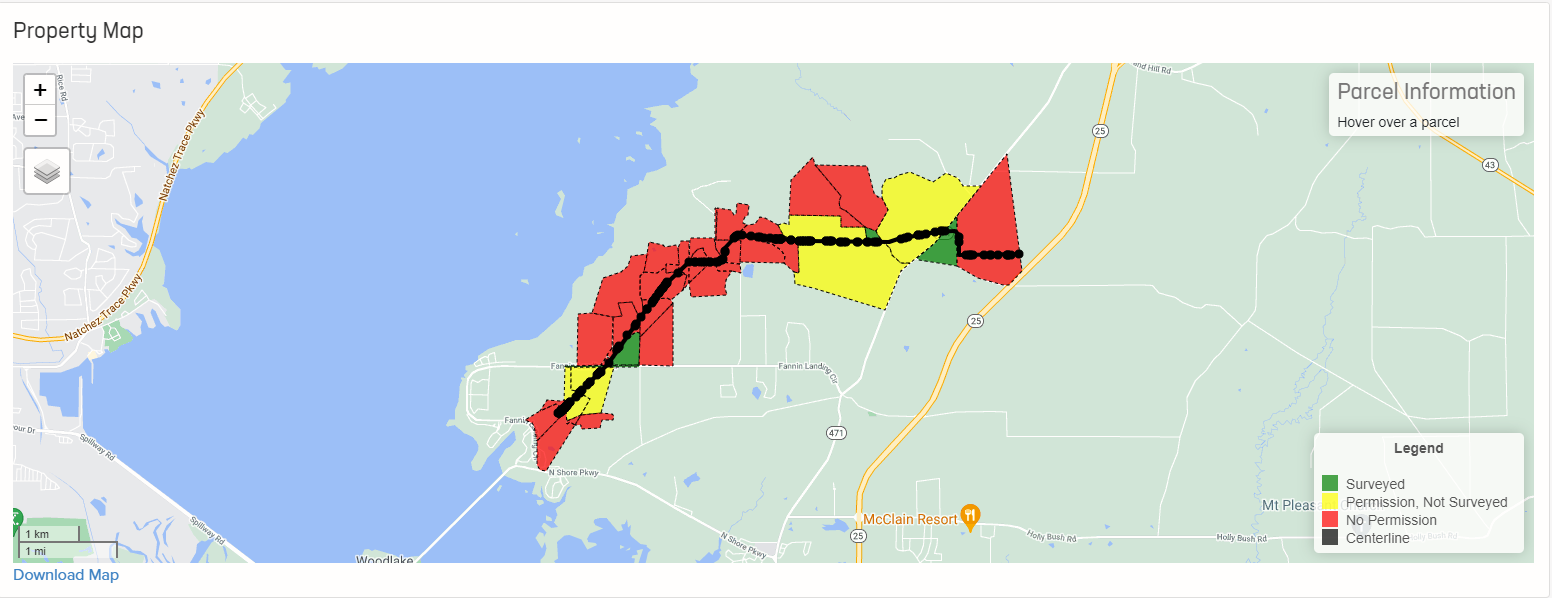
Property Map
The map displays parcels inside the project. Parcel status layers can be chosen from the drop-down menu located on the left side of the map. Point and alignment layers can turned on/off from the left tool bar on the map. Parcel information can be viewed by hovering the cursor over any parcel. This information then appears in the top right corner of the map.
(To print the map, click the Print Map button located at the bottom left of the map.)

Property Data
The table below the map allows users to select parcels (parcels can also be selected by clicking on that parcel in the map). Please follow the instructions for updating parcel statuses.
- Click on the desired parcel(s).
- Open the status drop-down menu you would like to update.
- Select the status to update to.
- Click Save Changes in the lower right corner to save.
Users can also update any imported line list information using this table.
Under the Exhibits, users can define what attributes to assign to exhibit templates. Please follow the instructions for creating exhibits.
- Click View Exhibit under the Exhibit Column
- Check off any desired attributes in the Map Layers and Displayed Border Fields selections.
- Right-click the check box under the Map Layers to customize layer styles.
- Choose a base map by hovering over the layers selection in the upper right of the map.
- Click Save As Template to save settings.
- Download the current exhibit by clicking the print or PDF buttons.
- Click the Save as Default to set the current template to auto load when opening all Exhibit forms for this project.