Prerequisites
The following applications are REQUIRED to run Skyline.
-
Microsoft Access 64 bit
-
64 bit Windows 8 or above operating system
-
Microsoft Access Database Engine 2010 (32 bit)
- Must install 64-bit first and 32-bit second
-
64 bit SQL Drivers only if installing Skyline Enterprise. Follow this link for more info: SQL driver info
-
If you are hosting the license on your network, then BSD Licensing Service hosting a Skyline License locally or on a host server will need to be installed.
If you are utilizing cloud licensing, you can bypass the licensing service setup instructions.
*AutoCAD 2021 and below will no longer be supported by Skyline. AutoCAD 2022 will be the lowest supported version.
Note for First Time Installations: All steps (1-8) below must be followed in the exact order listed for a successful Skyline installation.
1. Download and Install Skyline
2. Install the Skyline Licensing Service (for server licenses only)
5. Associate Skyline as a third-party extension to your AutoCAD
6. Add Skyline CUIX File to AutoCAD: Pull Down Menus & Toolbar Icons
7. Installation is complete, you are ready to run Skyline!!
8. Log in with your cloud license credentials
Step 1:
Download and Install Skyline
Current Skyline users should proceed to Step 4 (the Update section) of the Install Guide.
- Uninstall any previous versions of Skyline, if Skyline is not installed.
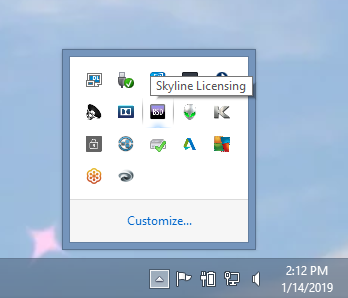
- Right click and exit out of the Skyline Licensing Service, if it is running in the system tray (as pictured below).
- Download the appropriate version of the Skyline Core Installer based on the Year of AutoCAD that will be used. Skyline Downloads.
- Extract the Skyline Core Installer.
- Run the SkylineFalcon20XXCore.
- Click “Install” and run through the installation when the following screen appears.

Step 2 (for server licenses only):
Install the Skyline Licensing Service. Skip this step if you are utilizing cloud licensing.
- Install Skyline Licensing Service.msi (License service for Client workstations).
This purple BSD icon will appear in the System Tray.

- Start the Skyline Licensing Service by double clicking on the Skyline Licensing icon on the desktop.
- Select the appropriate Skyline License type.
- Specify your licensing server name.
- Click on close to finish.
The “License Server” text box should contain the name of the machine (server) hosting the BSD license file. This may differ from the name of a user’s machine. Check with your system administrator to verify host server names.

Step 3:
Set Folder Permissions
- Open the C: Drive in a File Explorer.
- Look for the Skyline Seed folder (See here for "Access to Path is Denied"Error).
- Right click on it.
- Select the security options or properties option.
- Give full admin rights for the Users group to the folder
If “Properties” was clicked, continue to the “Security” tab. Click “Edit,” then click “Allow” on the “Full control” row, and then click “OK.”

- C:\Program Files\Blue Sky Evolution, LLC\SkylineFalcon20xx for Skyline 2025 and beyond. Repeat this process for C:\Program Files\Blue Sky Evolution, LLC\SkylineFalcon20xx
- Repeat this process for C:\Program Files (x86)\Blue Sky Development, Inc\Skyline Licensing Service (Ignore if using cloud licensing)
NOTE: If you are installing Skyline 2025 or 2026, you will need to look for the following folder under Program Files instead of "Program Files (x86)".
- C:\Program Files\Blue Sky Evolution, LLC\SkylineFalcon20xx
Step 4:
Update Skyline
- Download the Skyline Updater from the following link: Skyline Downloads.
Choose the Updater that matches the year version of AutoCAD that will be used for Skyline Falcon. - Open the zip file.
- Click “Extract,” then “Extract All.”
- Save the updater.
- Click on the updater that was saved.
The folder name will be similar to: skylinefalconupdater_6203_2014. - Click on the updater.
The file name will be: BSDSkylineFalconUpdater.exe. - Right click on the file and Run the file as administrator.
The file may need to be moved to the desktop to be able to run the updater file as administrator. Skyline Falcon will not update, if the file is not run as administrator. - Click “Start Extracting.”
- Close the window.
Step 5:
Associate Skyline as a third-party extension to your AutoCAD
- Open AutoCAD (no .dwg is necessary for this step)
- From the AutoCAD command line, run options
- Click on "Support File Search Path"
- Select "add" and then "browse"
- Provide the path to the SkylineFalcon20xx folder
- C:\Program Files (x86)\BSE\SkylineFalcon2022 (BSE folder only for 2022)
- Provide the same path under the folder "Trusted Locations" (Two yellow folders down)

Step 6 (OPTIONAL):
- In AutoCAD type Menuload at the command line.
This will open the Customize User Interface window. - Select the SkylineMenu file from the C:\Program Files (x86)\BSD(or BSE)\SkylineFalconXXXX) folder. (XXXX being the Year of ACAD you are installing Skyline on top of)
Step 7:
Installation is complete, you are ready to run Skyline!!
- Open AutoCAD.
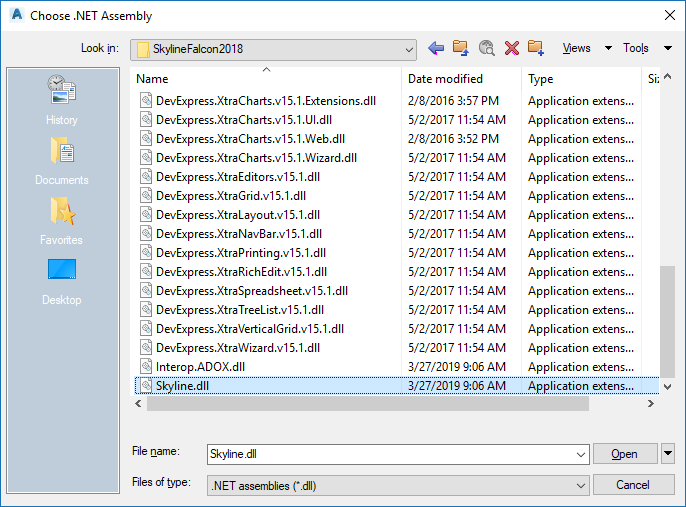
- Type NETLOAD and press enter.
- At the Choose .NET Assembly window, scroll down until you see Skyline.dll. (You may need to navigate to the Skyline folder in your computer: C:Drive ->Program File (x86) -> BSE (or BSD) -> SkylineFalcon[Year])
- Select Skyline.dll and click open.
- Type AUTOLOADSKYLINE in the command bar and press enter.
- In the future, when you type in SKYLINE in the command bar, the program will appear.
- Launch Skyline.
- Download the Skyline Training Seed file Here
Step 8:
Log in with your cloud license credentials. Skip this step if using a server license.
Cloud licensing functionality will automatically be included in any Skyline subscription.
1. Before starting Skyline, make sure that the skyline licensing service app is not running in your app tray in the bottom right of your screen.
2. Open up Skyline. Click off of the loading screen to reveal this dialogue box hidden behind it.

3. Click "Yes", and then use the following login box to input the credentials provided to you

4. After logging in, you can select a license from those available to you, as well as their type (permanent/regular/borrow).

5. If you select a borrowed license, you must select how many days to borrow it. If you log out with a borrowed license, it will remain borrowed until the time is up.
-
- If you log out with a regular license, you will need to log in again and re-select it to check it out again.
6. Once you click "Check Out", the Skyline interface will open.