
The Manage Projects Tool gives an overarching view of your Orbital subscription usage and also allows the project manager or administrator to manage alignments and manifest files.
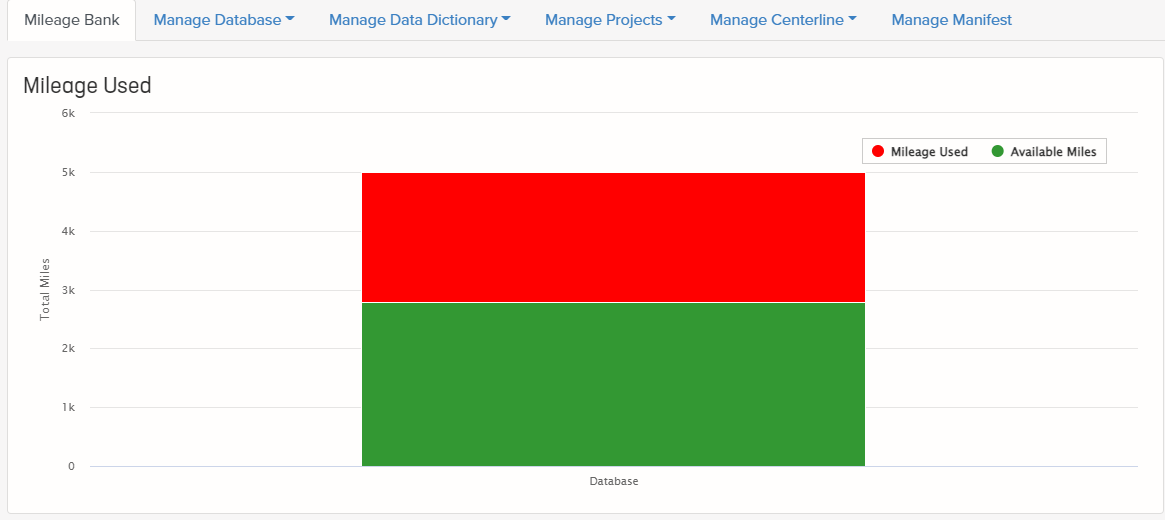
Mileage Bank
The Mileage Bank displays a graph of the total miles in your Orbital subscription. Available miles are shown in green while used miles are shown in red. The color key can also be found on the top of the graph. The exact number for available and used mileage can be viewed by hovering the cursor over the graph.
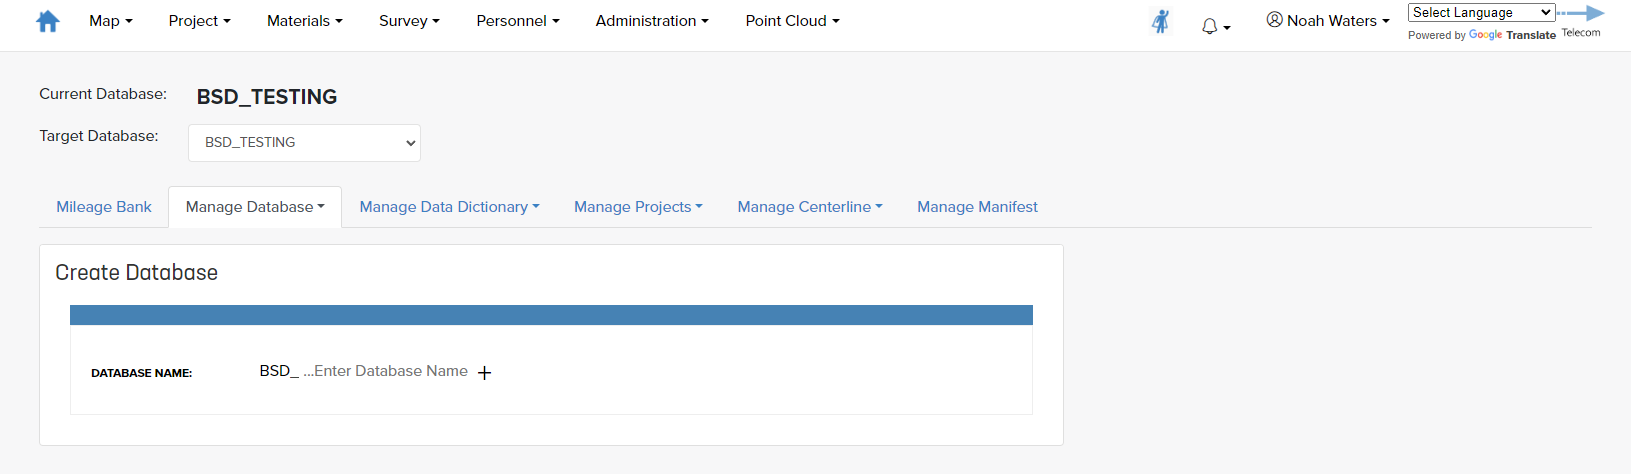
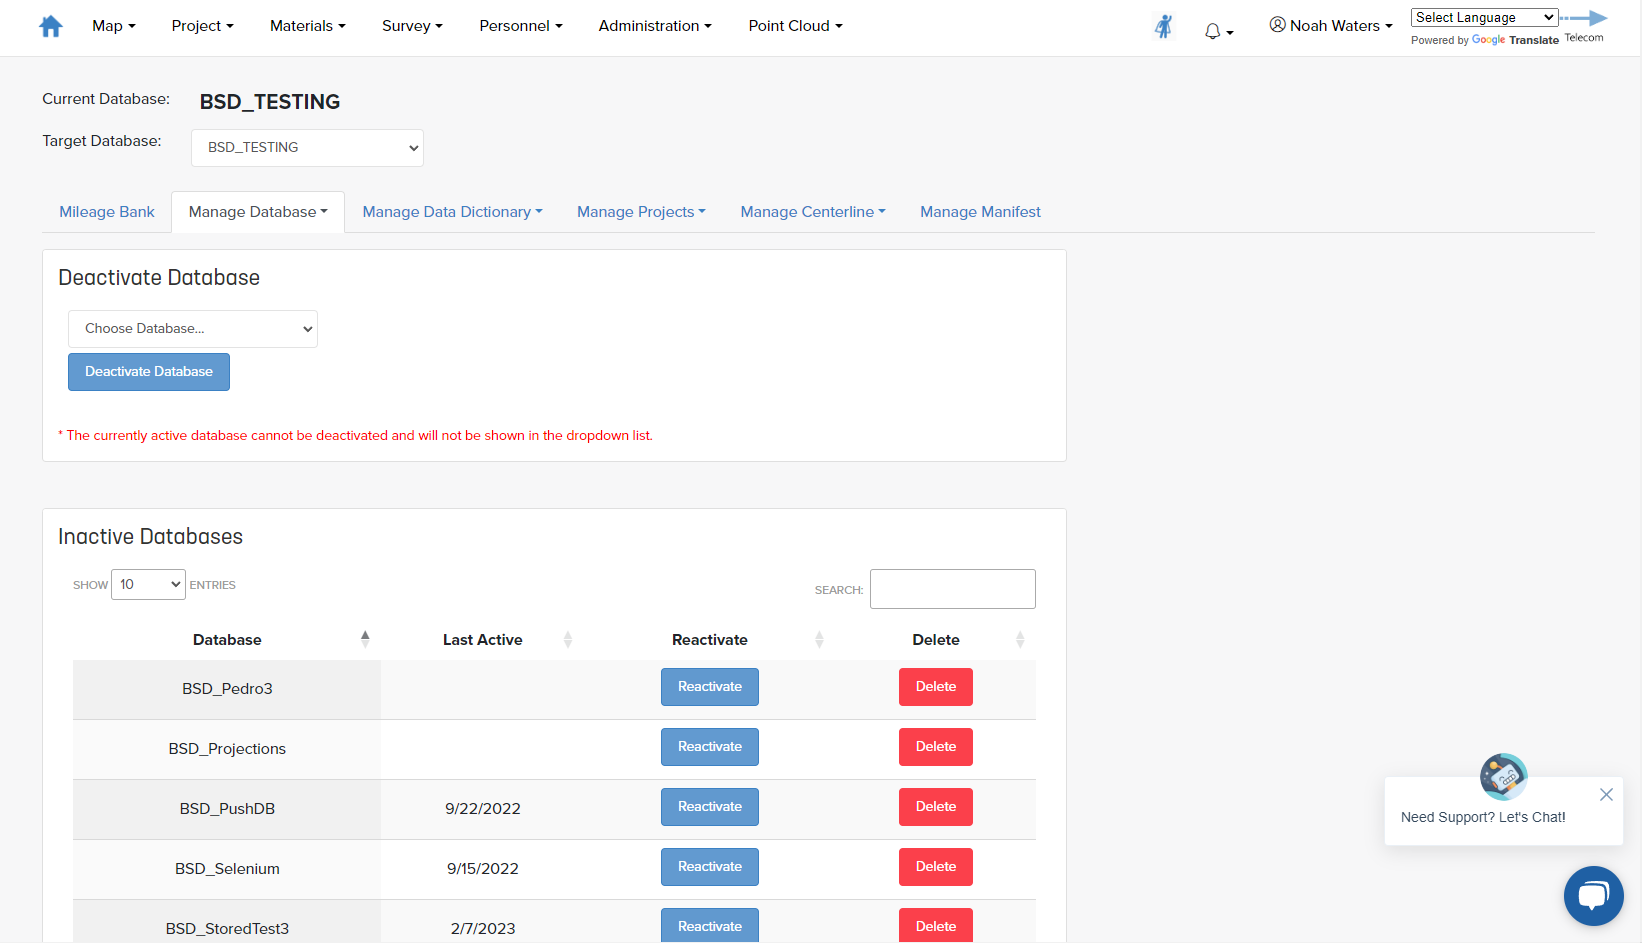
Manage Database
The Manage Database tab allows users to create or delete a database. To create a database, the user must type in the name and then select the "+" button next to that field.
To delete a database, the user must first deactivate the desired database. That database will then show up in the list below, and can be reactivated or permanently deleted.
Manage Data Dictionary
The user can upload their fxl, or import PML codes if necessary.
Manage Projects
This tab allows administrators and project managers to create, import, and remove projects, as well as view completed projects.
- Create Projects

- Enter project name.
(Steps b-d will narrow down the available projections based on your choices.) - Select projection type.
- Select datum.
- Choose units.
- Choose a projection from the Projections Available drop-down.
- Click Create Project.
- Enter project name.
- Import Projects
- Remove Projects
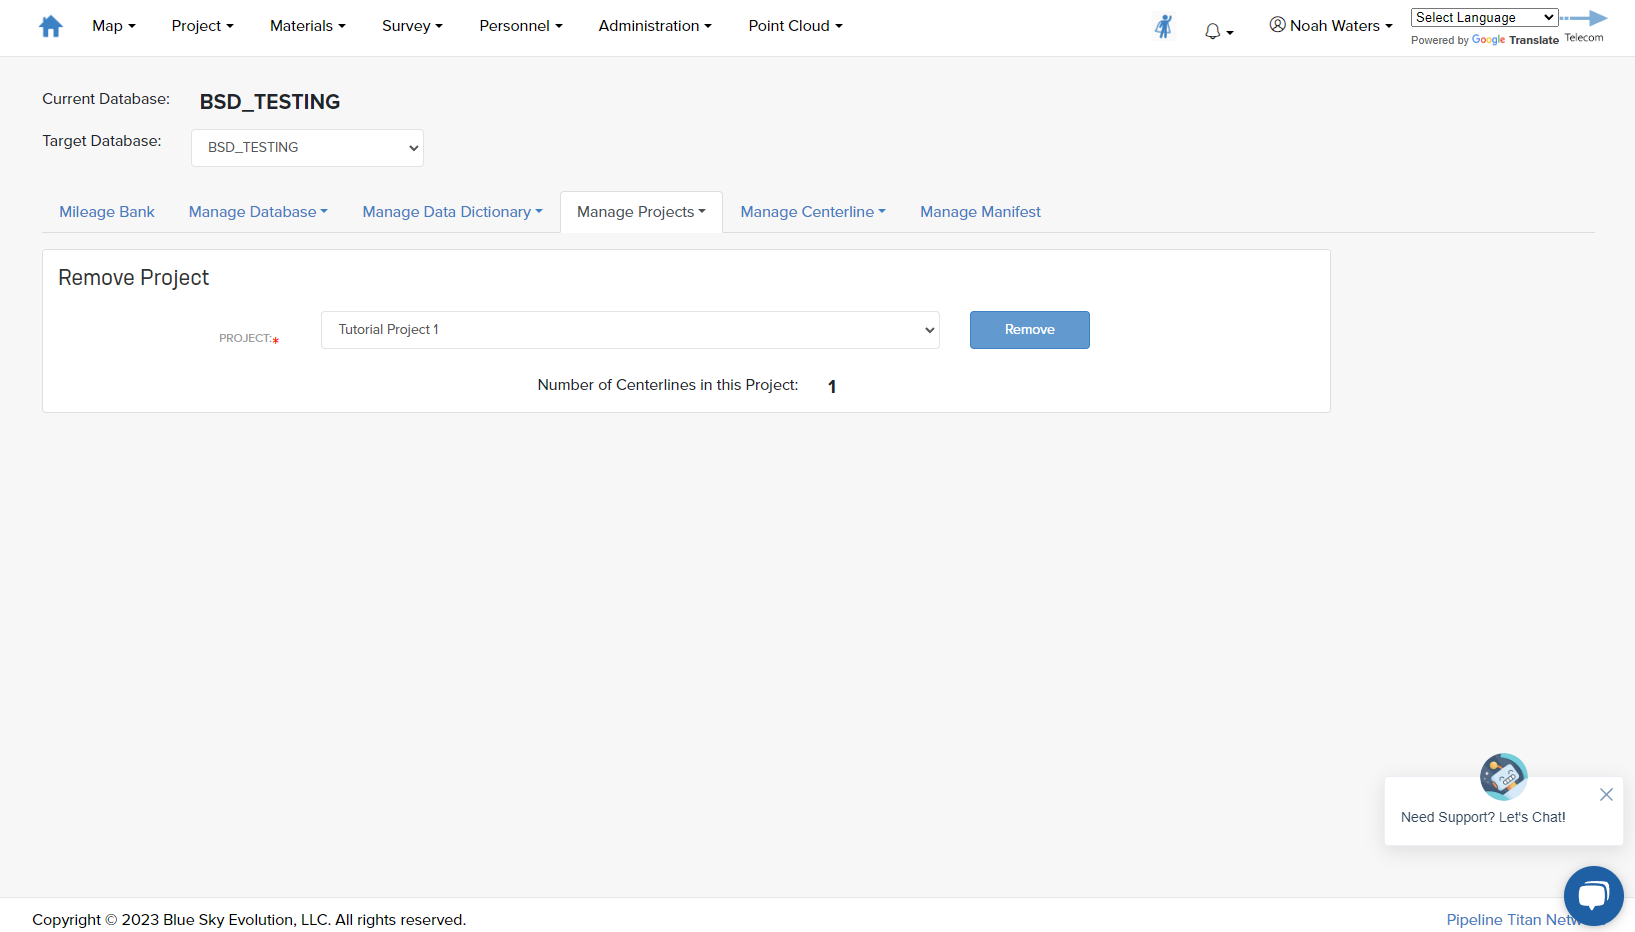
- Select a target Database
- Select a Project from the dropdown
- Orbital will inform you of how many Centerlines exist in that Project
- Click "Remove"
- Completed Projects

- Users can select a project to mark as complete. These projects will display in a table below.
Manage Centerline
This tab allows administrators and project managers to add new centerlines to existing projects. Approving added Centerline will consume mileage from the Mileage Bank. Follow the below instructions to perform each action.
- Creating Centerlines
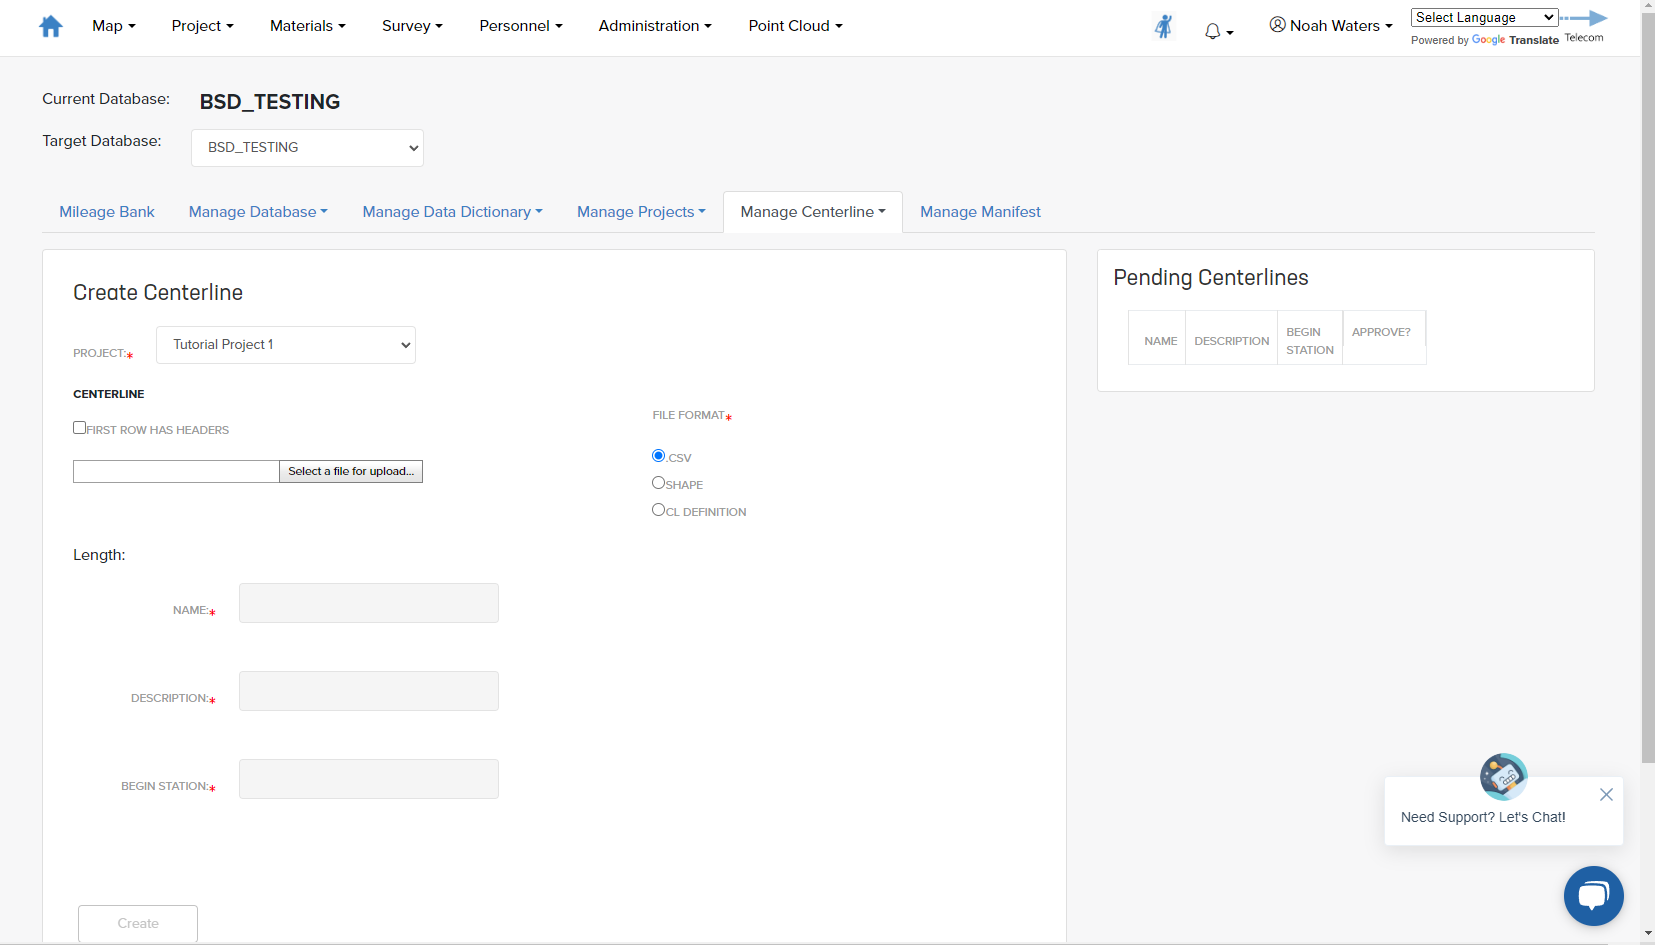
- Select the project you wish to add an centerline to from the Project drop-down menu.
- Select file format.
- NOTE: If you are uploading a Shape File, the file must be zipped, and all files inside must share the same file name as the zipped file.
- Attach an centerline.
- Name centerline.
- Give your centerline a description.
- Set Begin Station.
- Click Create.
- Review centerline details.
- Click Approve to finish.
- Removing Centerlines (Mark an centerline as inactive when no longer needed or to free up mileage space in the mileage bank.)

- Choose an project from the Project drop-down menu.
- Click on the row of the centerline you would like to remove.
*Note* You cannot remove the centerline you're currently logged into. - Click Remove.
- Reroute Centerlines (NOTE: You must upload the centerline that you wish to replace your original centerline with prior to these steps)
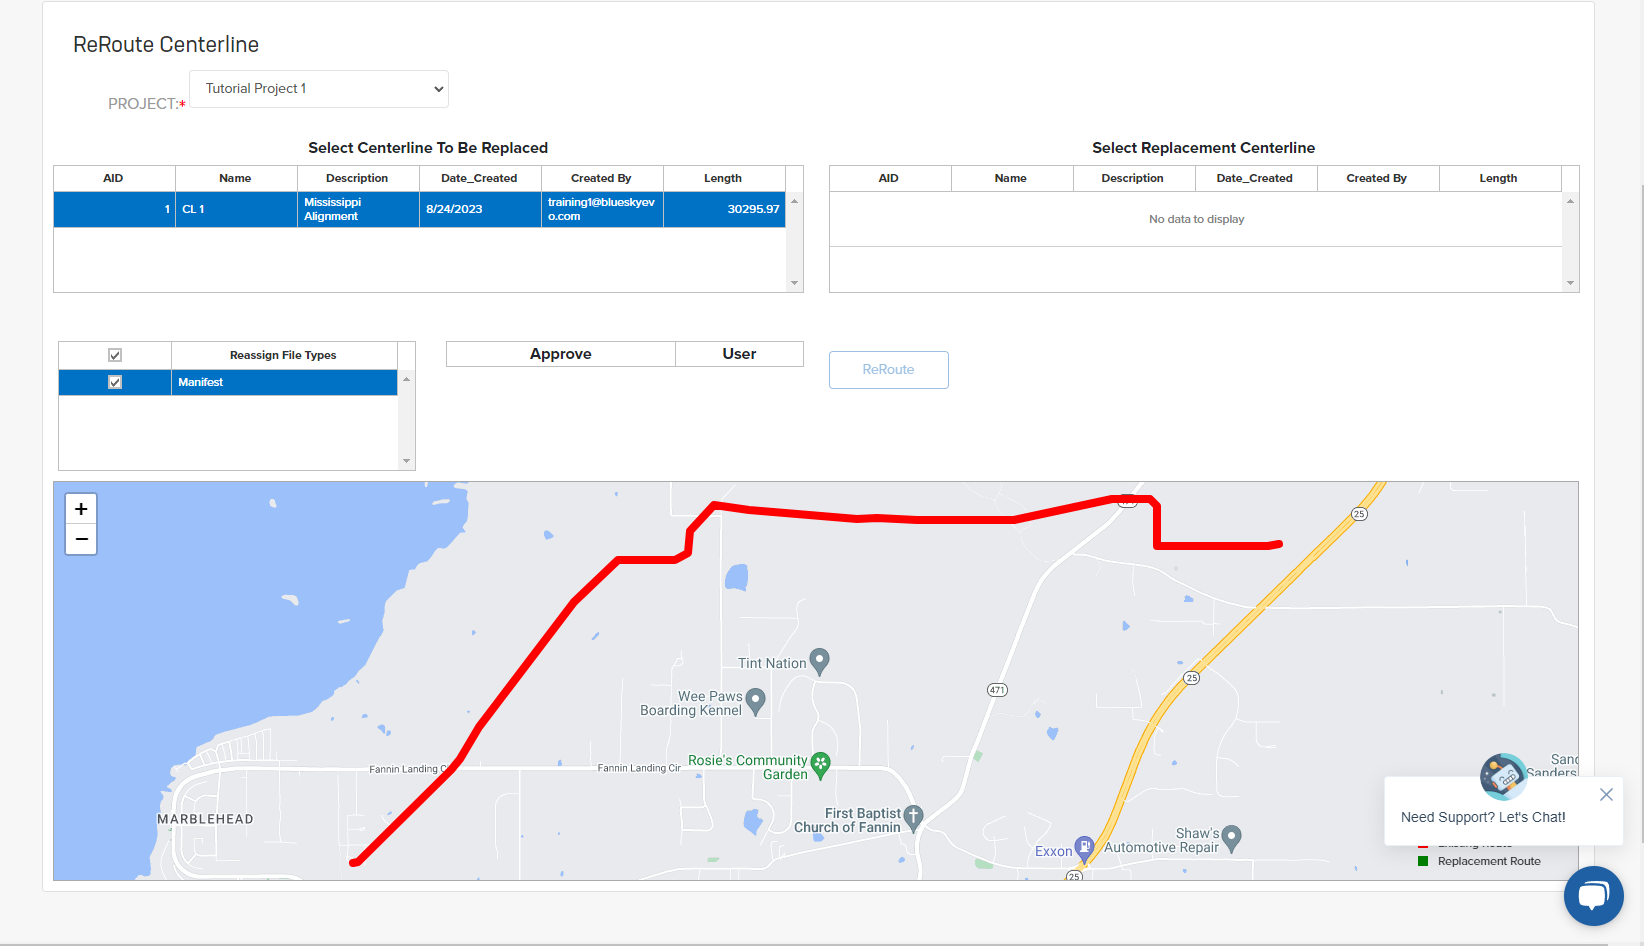
- Choose the project you would like to perform a reroute on from the Project drop-down menu.
- Click on the row of the centerline that you would like to replace from the Select Centerline To Be Replaced table.
The selected centerline will appear in red on the map. This centerline will be marked as inactive and listed under the Restore Centerlines tab, once the reroute is completed. - Click the ReRoute button to complete the reroute.
All documents, setting, and analytics will be carried over to the new centerline. The original centerline will also be deactivated, but can be restored in the Restore Centerline tab.
- Restore Centerlines (NOTE: Used to restore previously removed centerlines)
- Choose the project you would like to restore an centerline from in the Project drop-down menu.
- Click on the row of the centerline that you would like to restore.
- Click Restore to re-activate the centerline.
Manage Manifest
Used to add manifest data.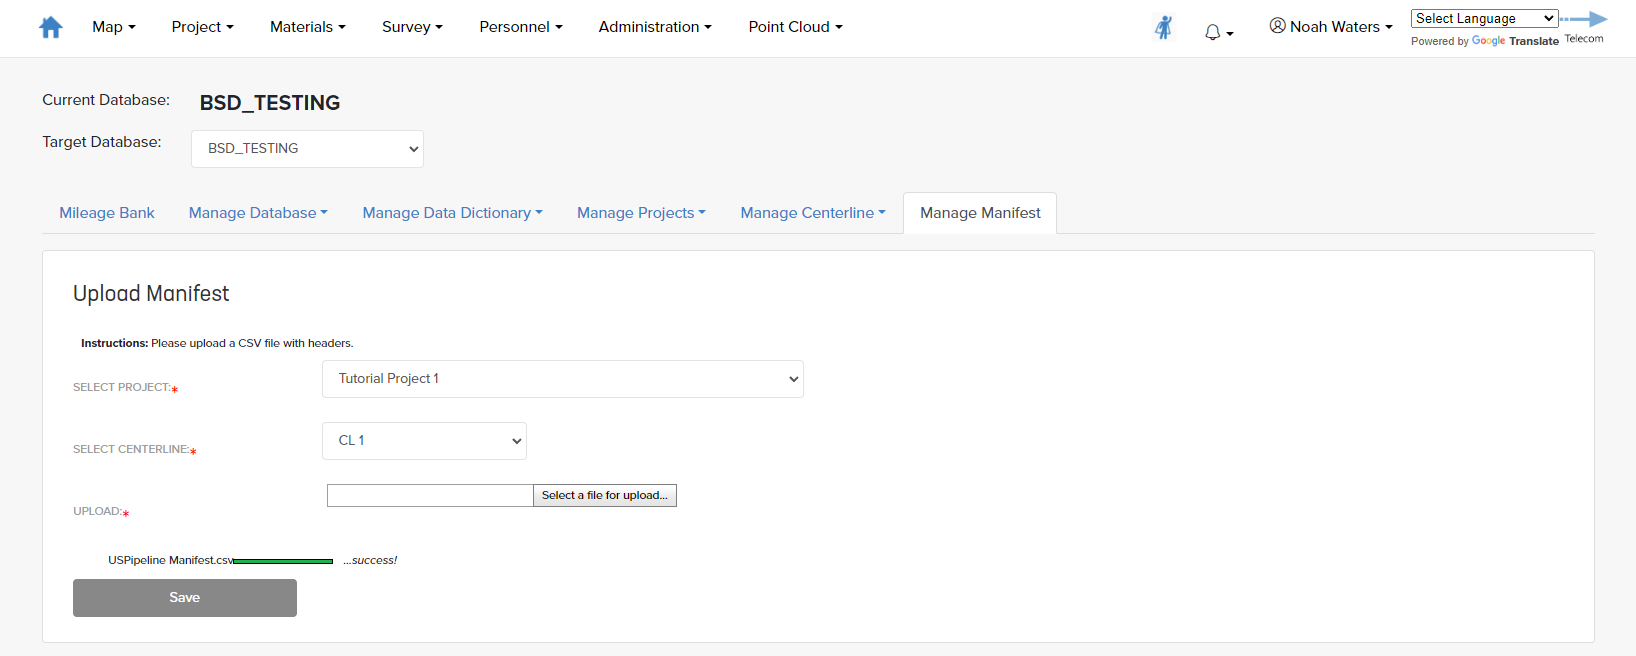
- Select a project from the drop-down menu.
- Select alignment.
- Choose to use an existing manifest or to upload new manifest.
- Map your file's columns into Orbital.
- Click Save

NOTE These are the columns to be mapped to. Any columns that are not needed at any given time may be removed during mapping.
- JOINT NUMBER
- JOINT_LENGTH_ID
- HEAT_NUMBER
- PIPE_LONG_SEAM
- MOMINAL_DIAMETER
- NOMINAL_WALL_THICKNESS
- PIPE_SPECIFICATION
- PIPE_GRADE
- SMYS
- MANUFACTURER
- COIL_NUMBER
- WEIGHT_LBS
- DATE_MANUFACTURED
- PIPE_MILL_LOCATION
- MTR_NO
- MTR_DATE
- PO_NUMBER
- PO_DATE
- COATING_TYPE
- COATING_MATERIAL
- COATING_MANUFACTURER
- PRODUCT_NAME
- COATING_APPLICATOR
- WHERE_COATING_APPLIED
- DATE_APPLIED
- COATING_APPLICATOR_NAME
- SURFACE_PREP_TYPE
- COATING_THICKNESS
- COATING_NUMBER
- HORIZ_ANGLE
- VERT_ANGLE
- BEND_TYPE
- BEND_RADIUS
- FABRICATOR_TYPE
- BOL_NO
- BOL_DATE
- DatabaseOwner