Workflow Tool - Create/Edit/Delete
The Workflow tool aids in management and organization of Orbital Projects.
NOTE: To use the Workflow tool, you must first select a Database and Project.
- Whatever workflows exist under the Database will be available from any Project associated with it.
Creating a Workflow
Adding Steps
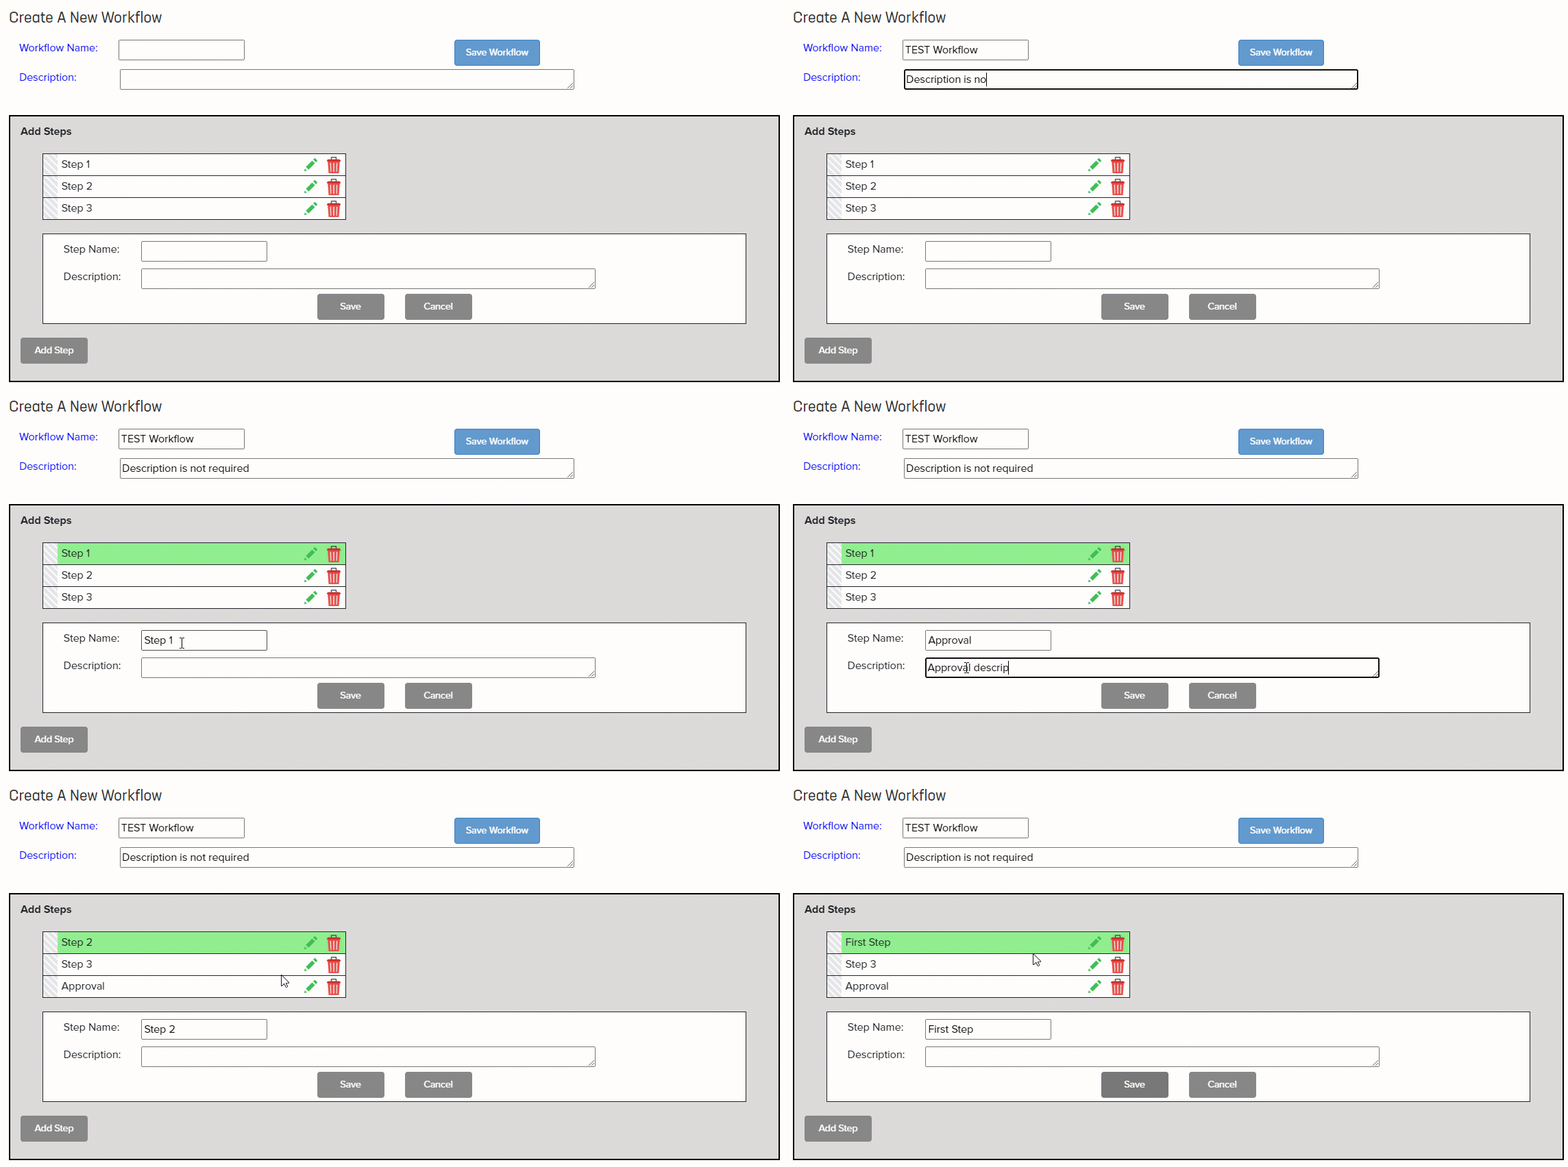
- Name your workflow.
- Add Steps by filling out the Step Name and Description.
- Steps can be rearranged by clicking and dragging from the left-most "striped region".
Add Workflow Attributes
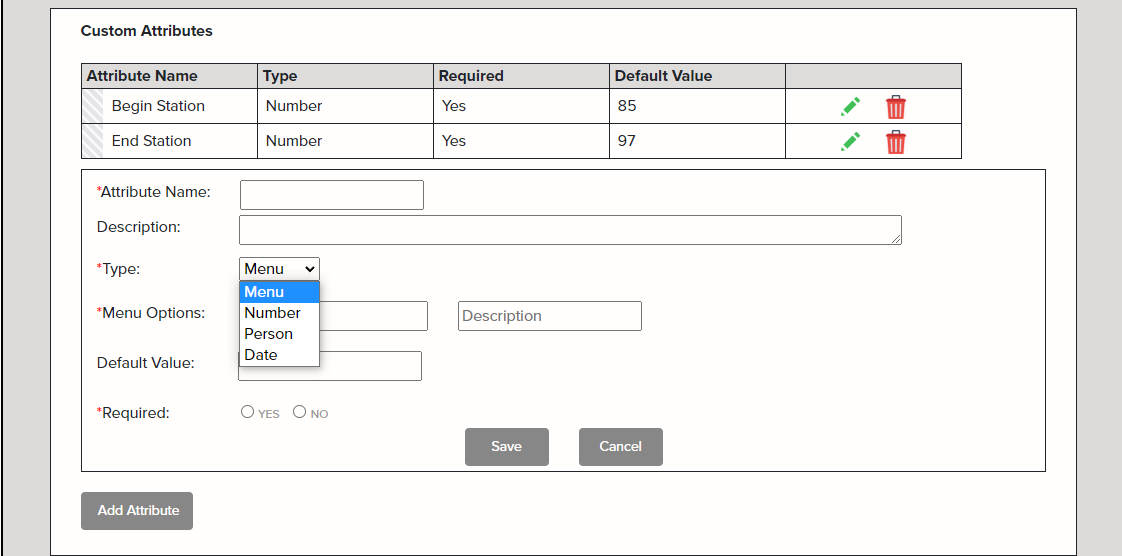
- Assign an Attribute name and select the attribute type
- Menu:

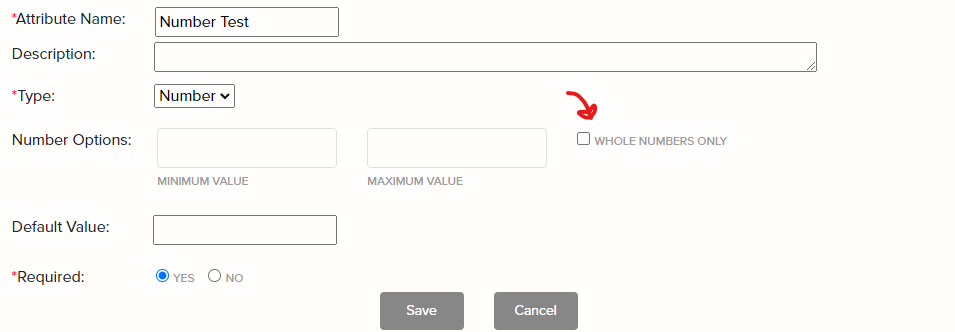
- Number: Select a minimum and maximum value. You can choose whether the value is required, as well as whether you want only whole numbers.
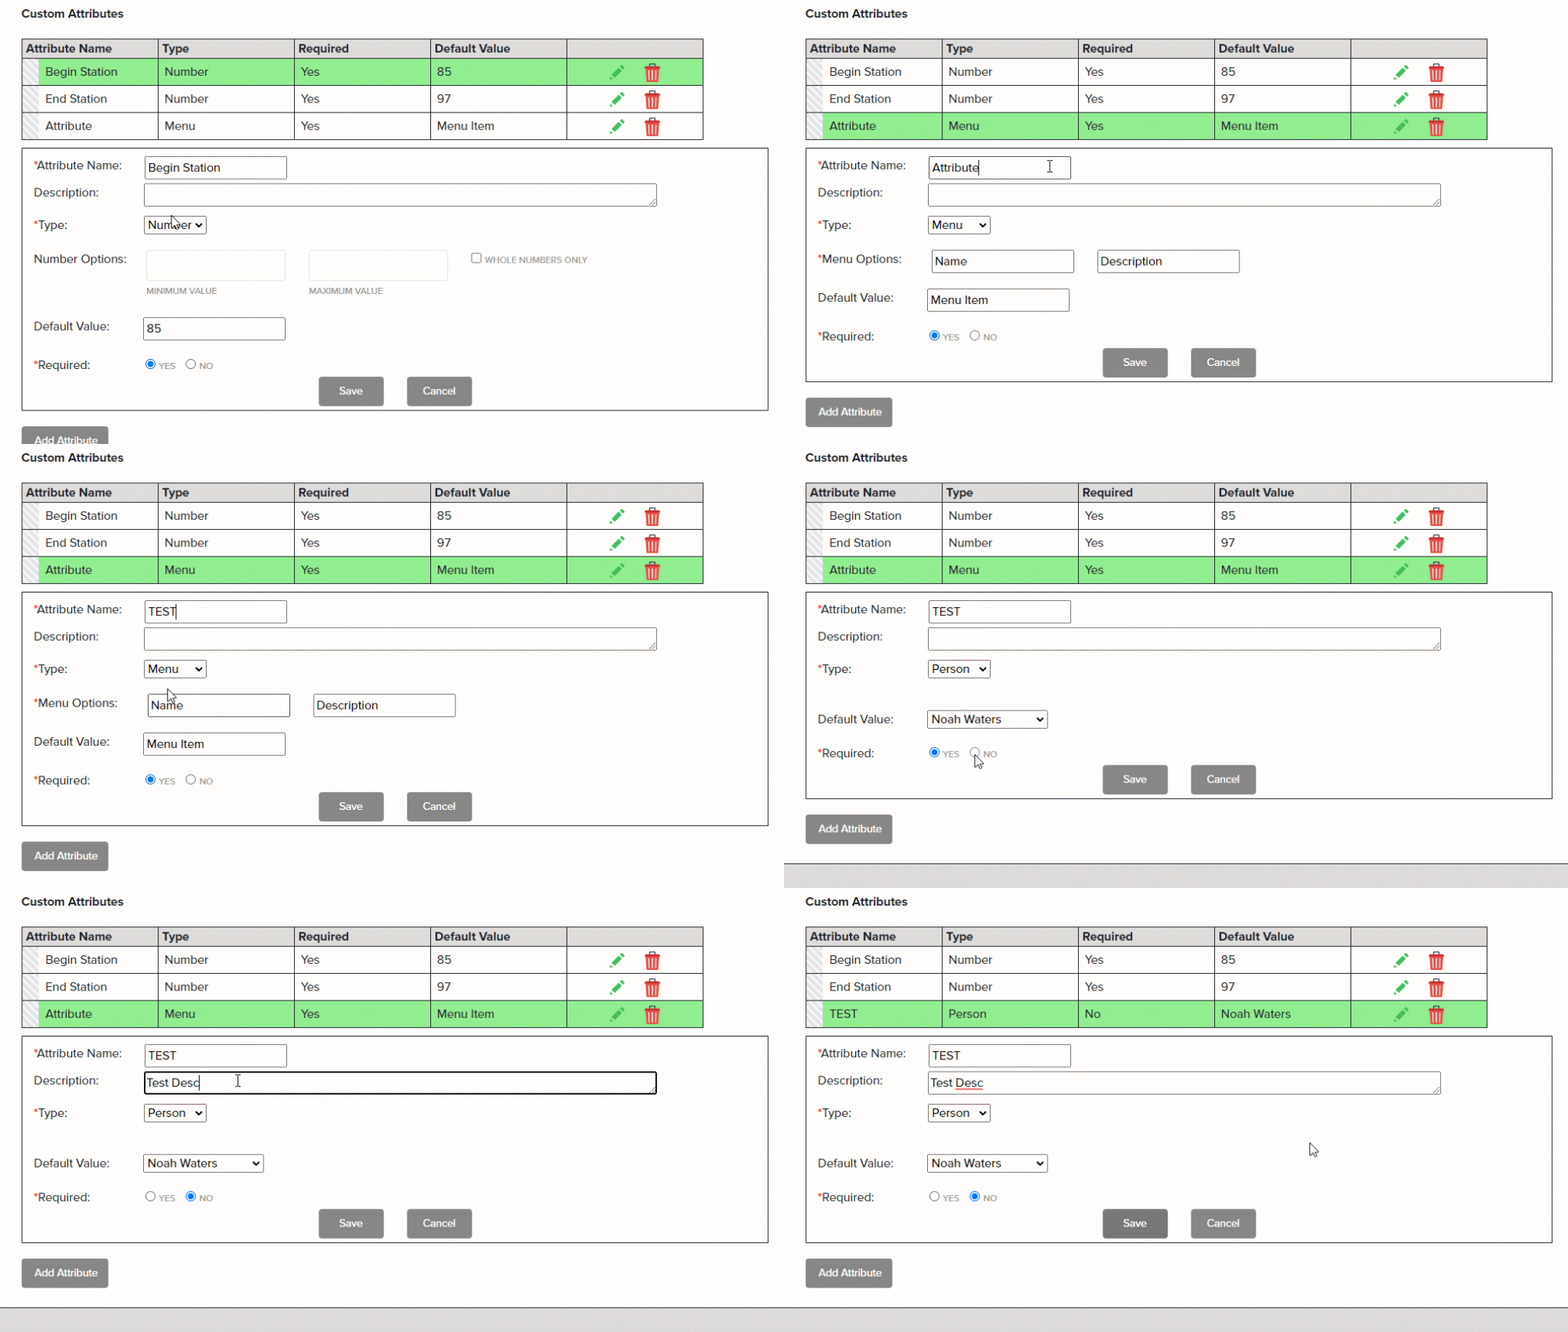
- Person: Name the Attribute, and determine whether it required.

- Date: Name the Attribute, and determine whether it is required.

- Menu:
- When you are ready to add an Attribute, click "Add Attribute".
- To edit Attributes, select the green pencil icon, make the necessary changes, and then click "Save".
Saving the Workflow
After following the above-listed steps, click "Save Workflow", located at the bottom on the page.

TIP: Every Workflow has default attributes that always populate while adding Work Units:
- Name
- Description
- Owner
- Stakeholders
- Due Date
- Attachments
These values can be edited later in the Workflow Manager.
Editing a Workflow
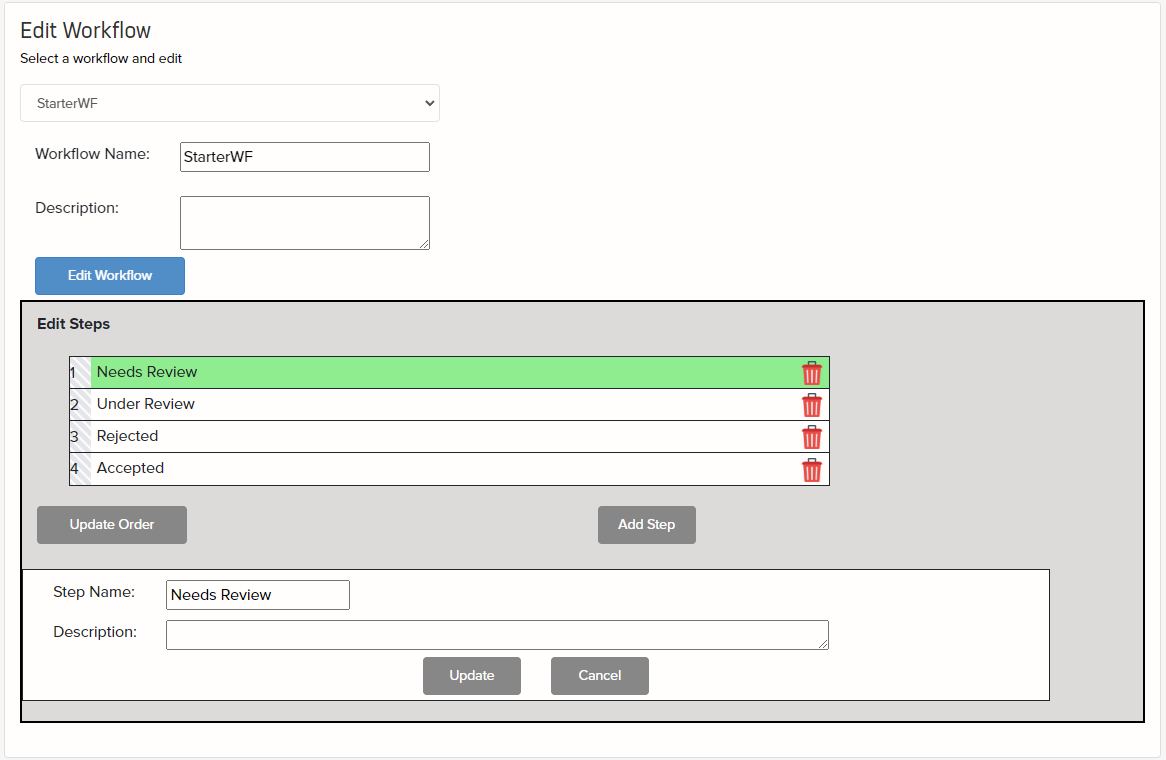
- Select a workflow from the dropdown menu to edit it.
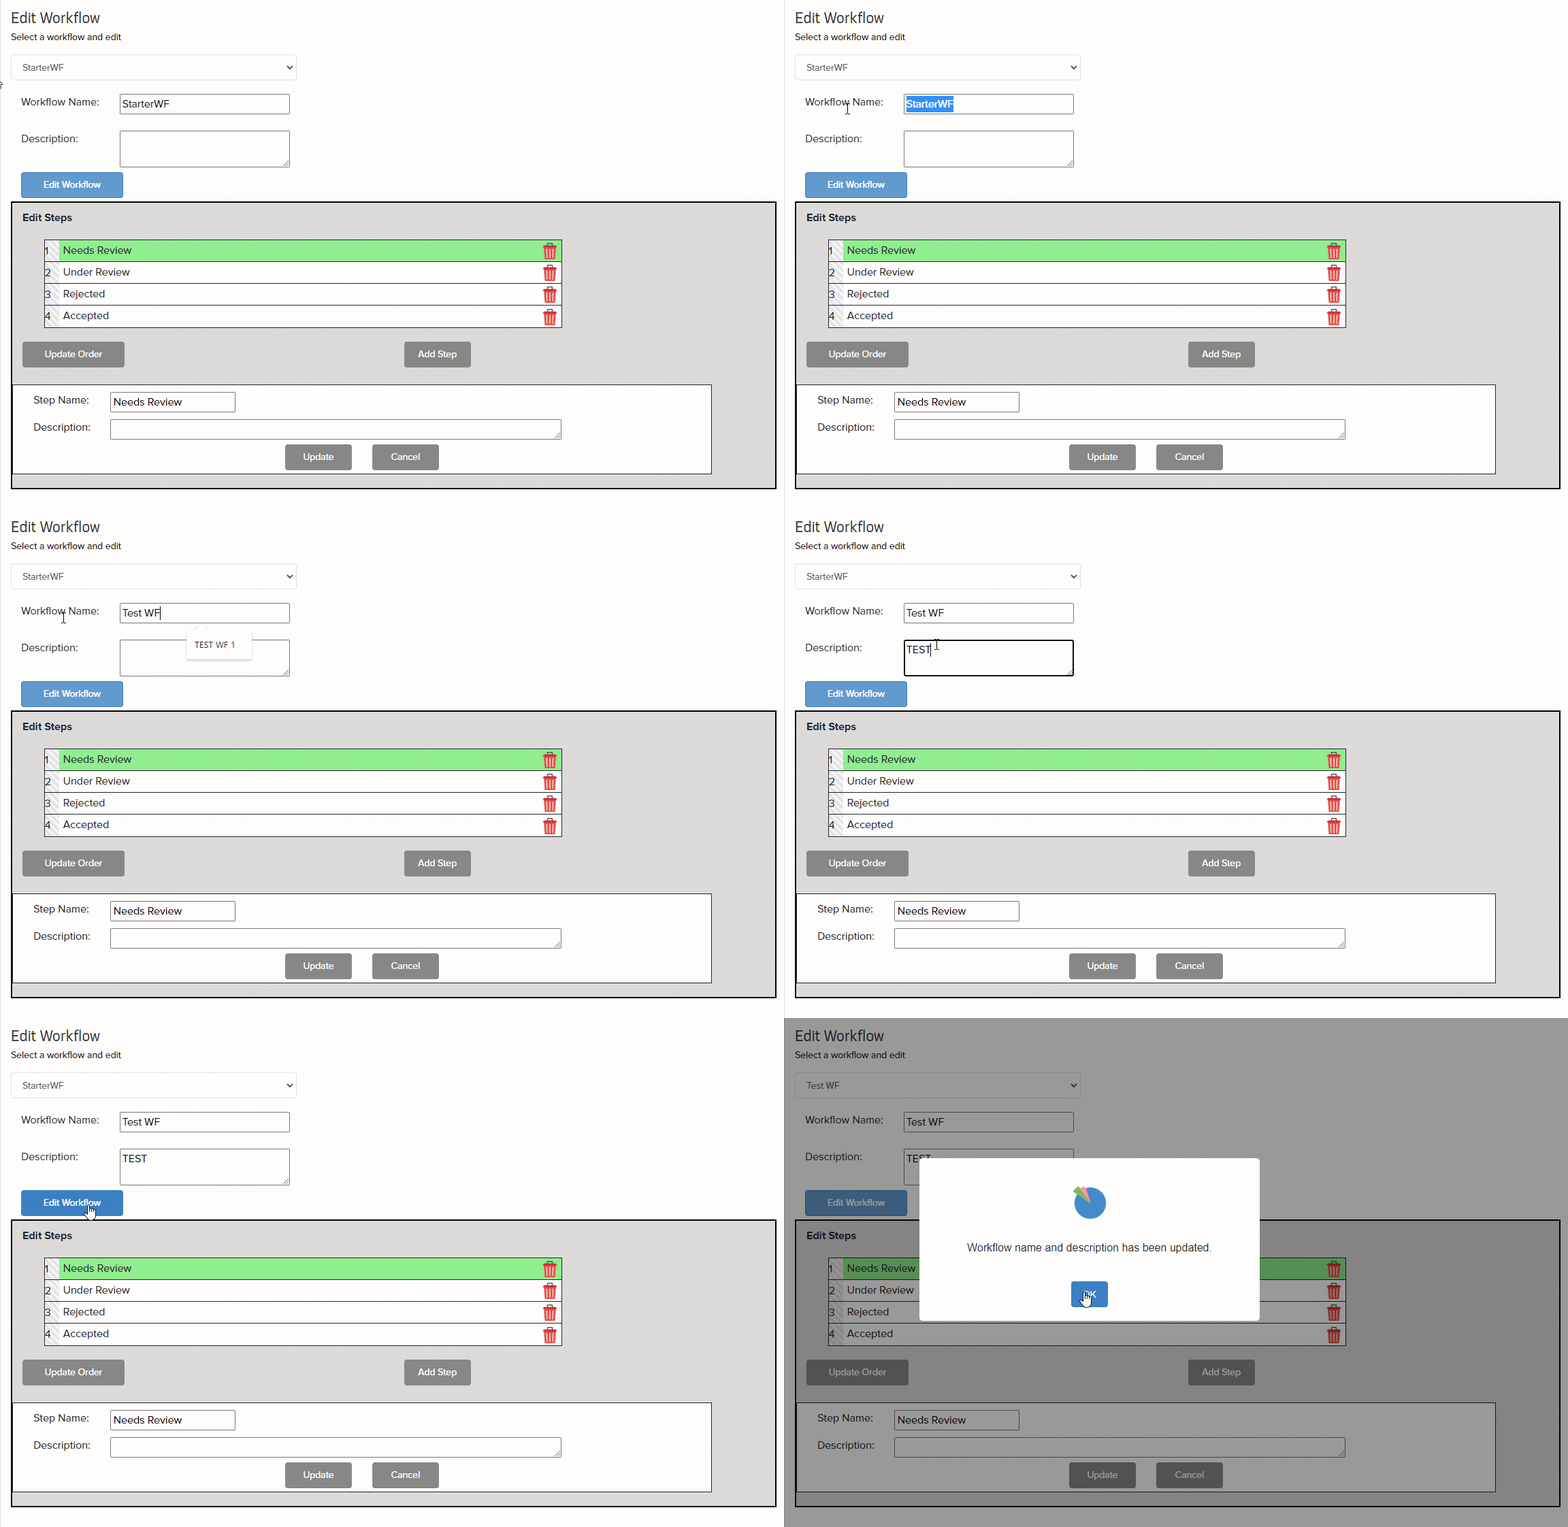
- From here, you can change the Workflow Name and Description.
- Change the desired information in the Step Name and Description, and click "Update"
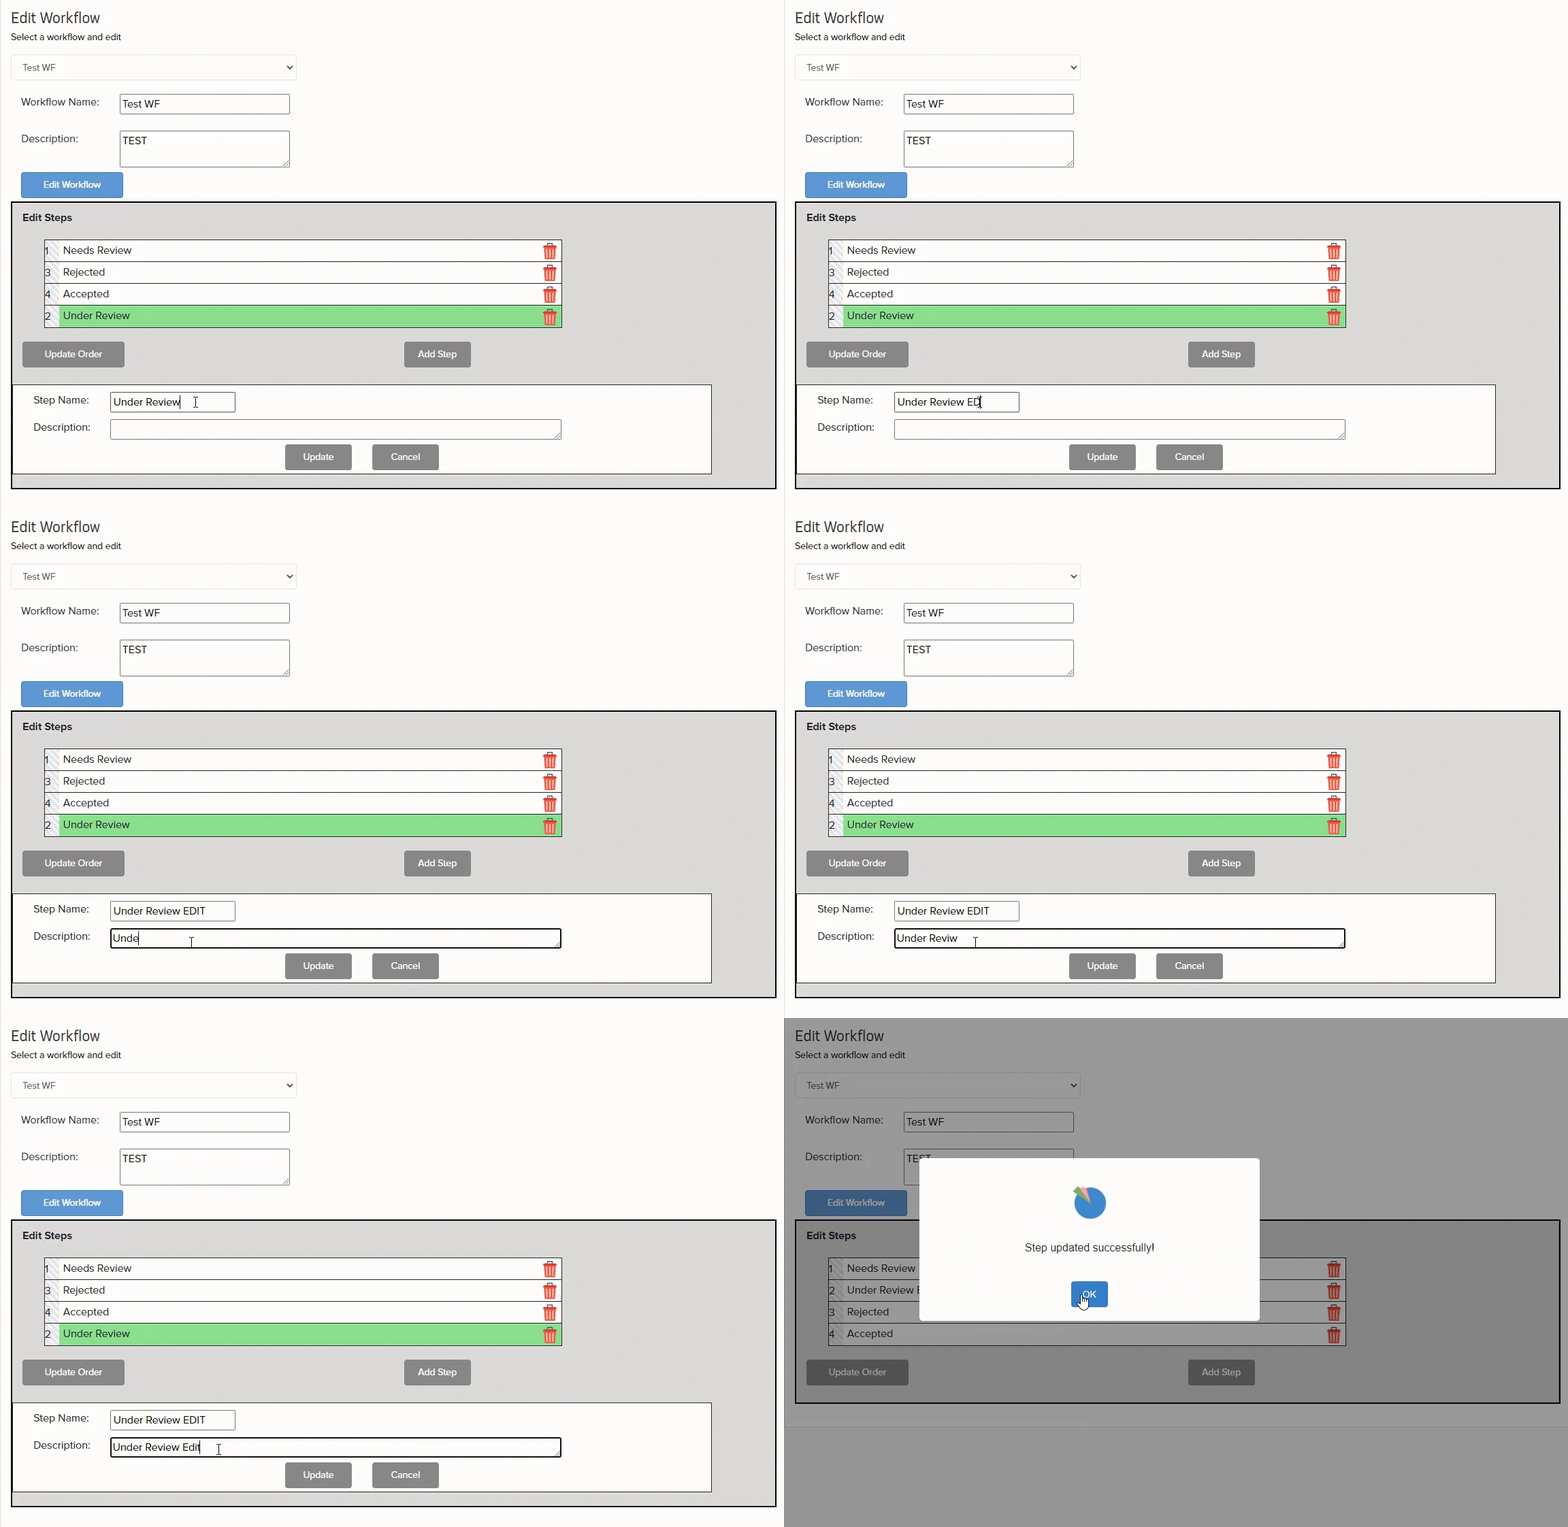
- To change the order of the Steps, simply click and drag by the gray striped area on the left. Once arranged as desired, you can save it by clicking "Update Order".